Usage GuideUpdated a year ago
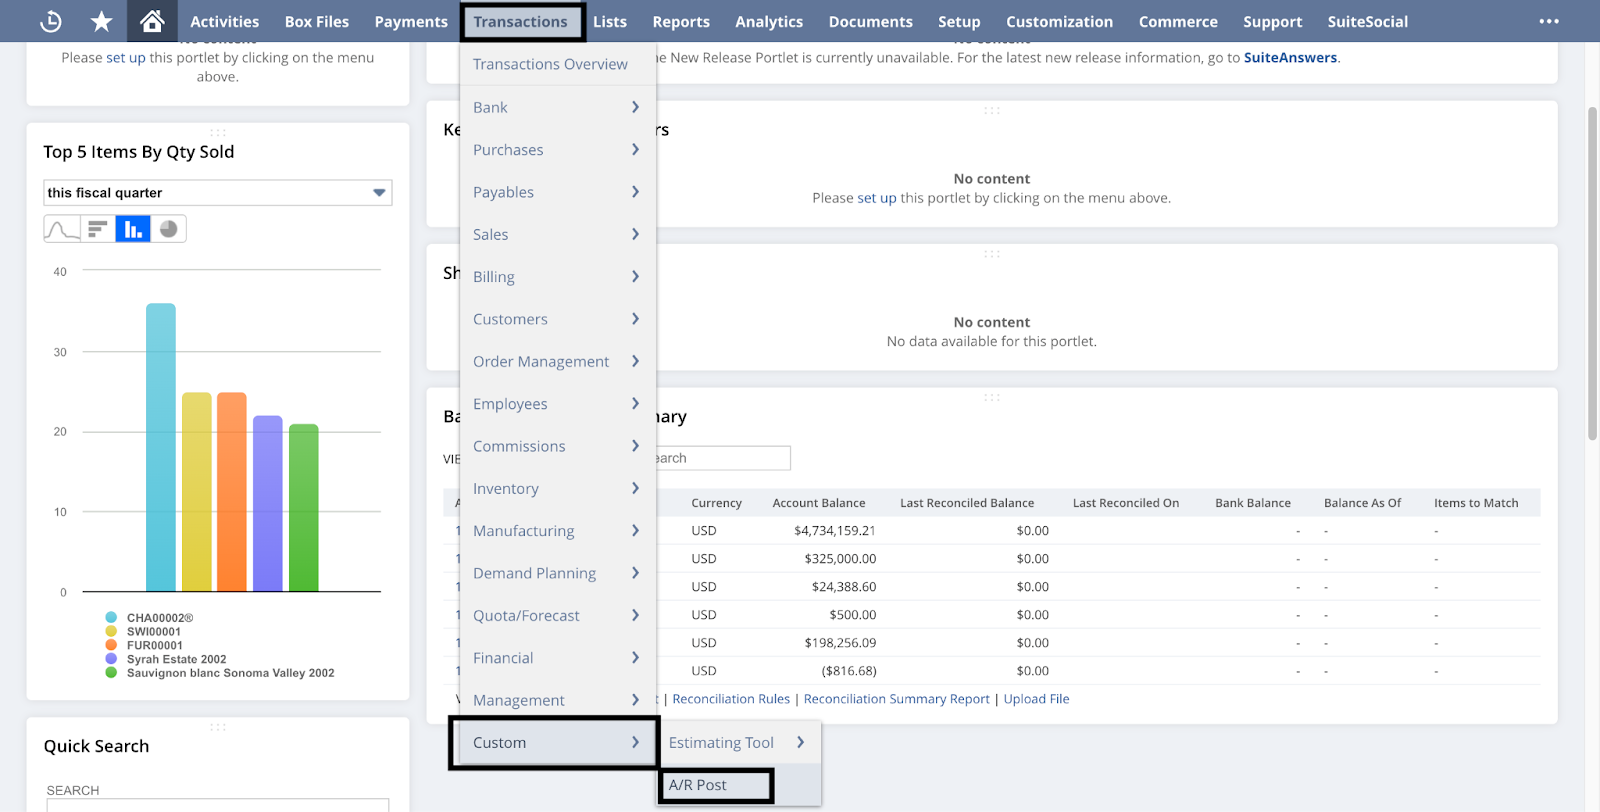
Launching the A/R Post Application
To open the A/R Post Application Dashboard, select Transactions > Custom > A/R Post
Application UI
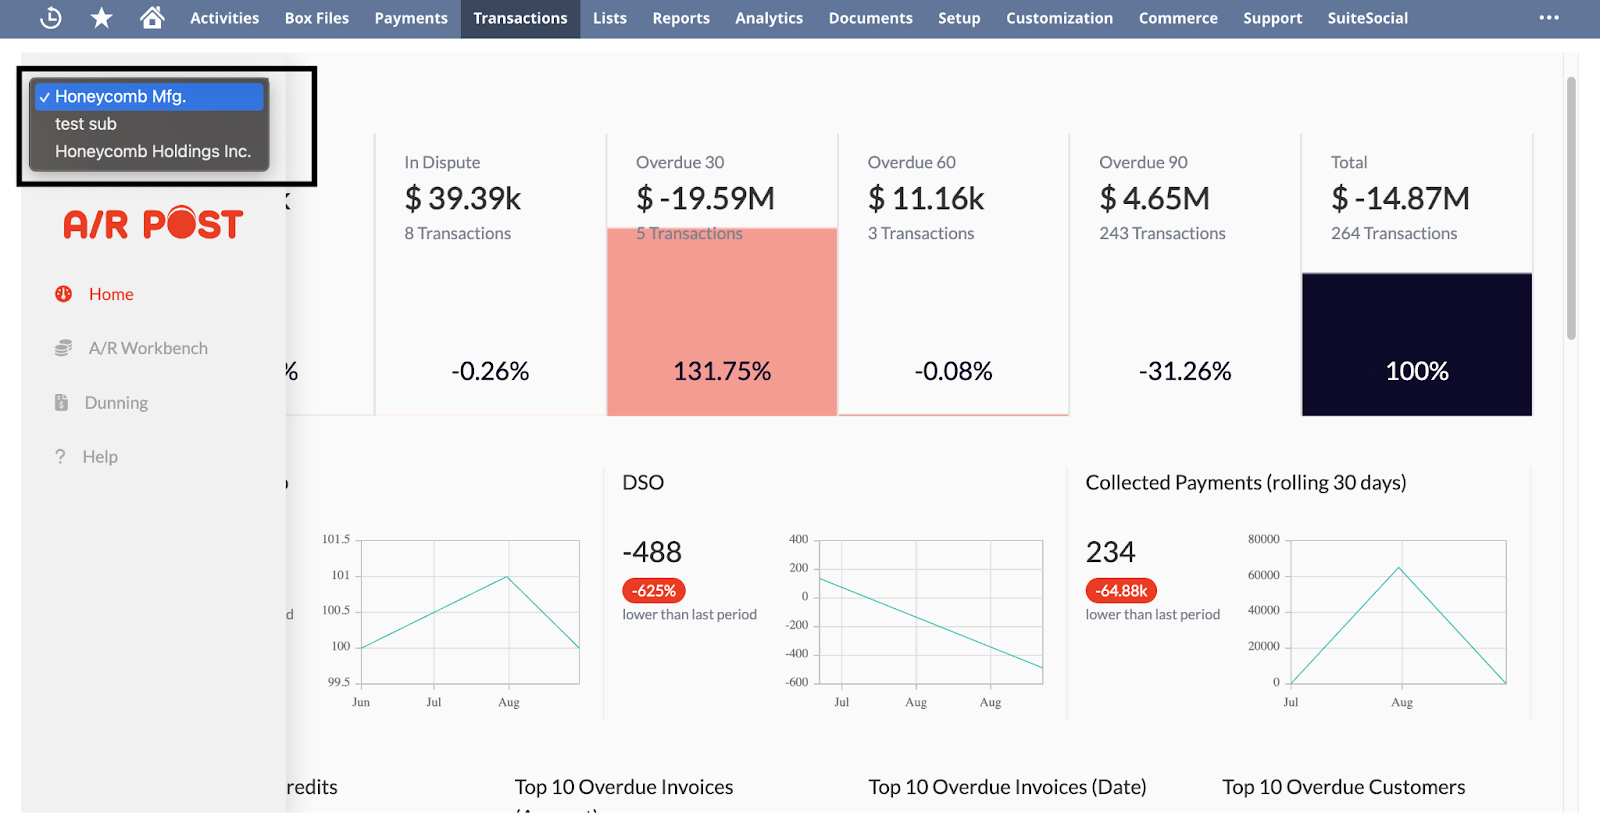
A/R Post Menu Bar Navigation
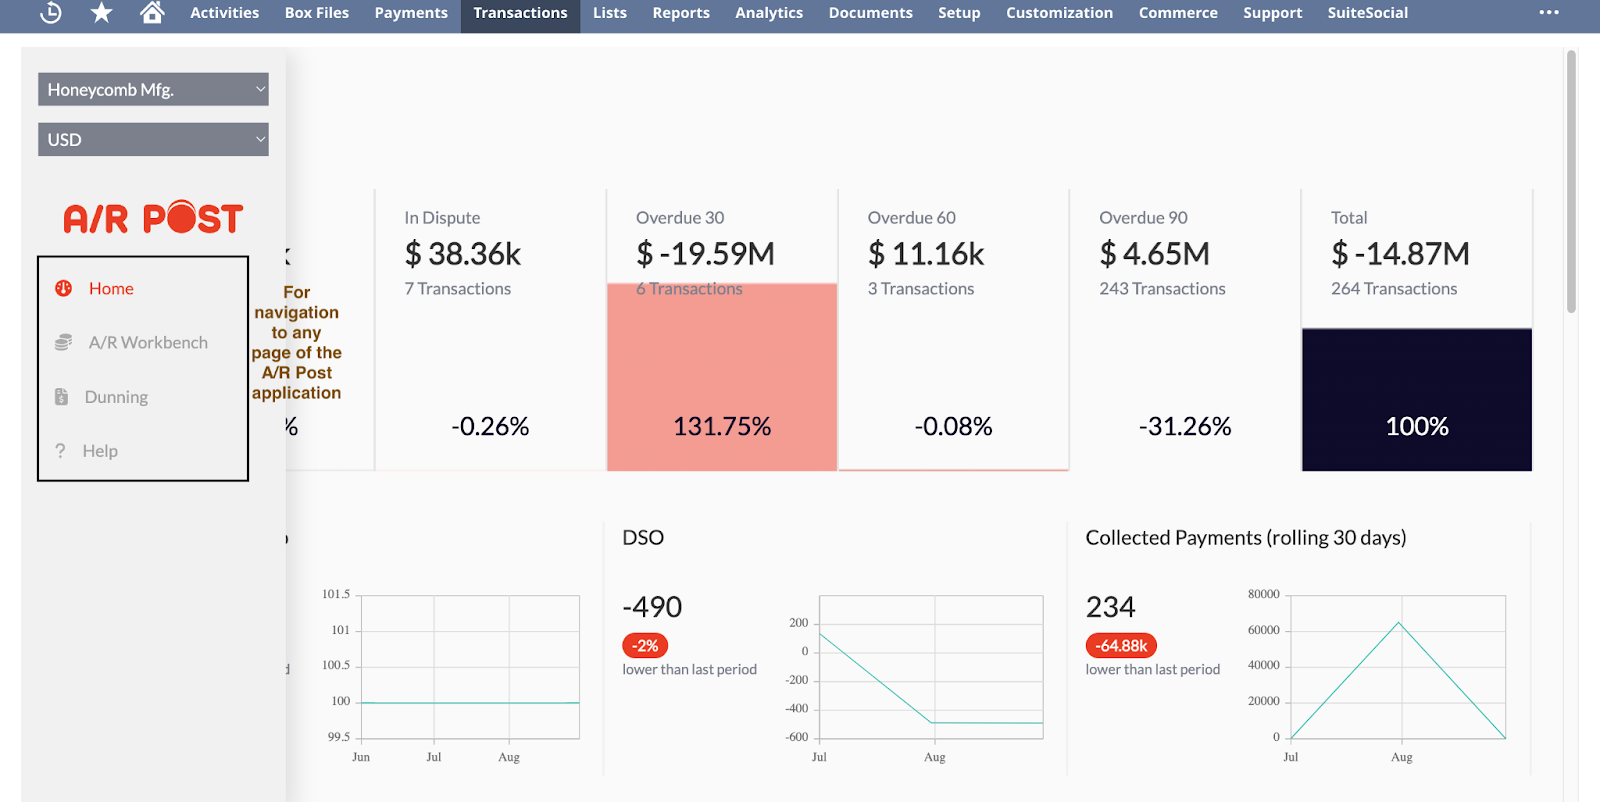
On the left-hand side of the application, you will be an expandable menu - that appears on mouse hover.
The main menu items found on this navigation are the:
Multi-subsidiary dropdown and currency dropdown alongside the following menu links:
- Home
- A/R Workbench
- Dunning
- Help
Users with a NetSuite One-World Account will be able to switch to one of their multiple subsidiaries to see that subsidiary A/R view.
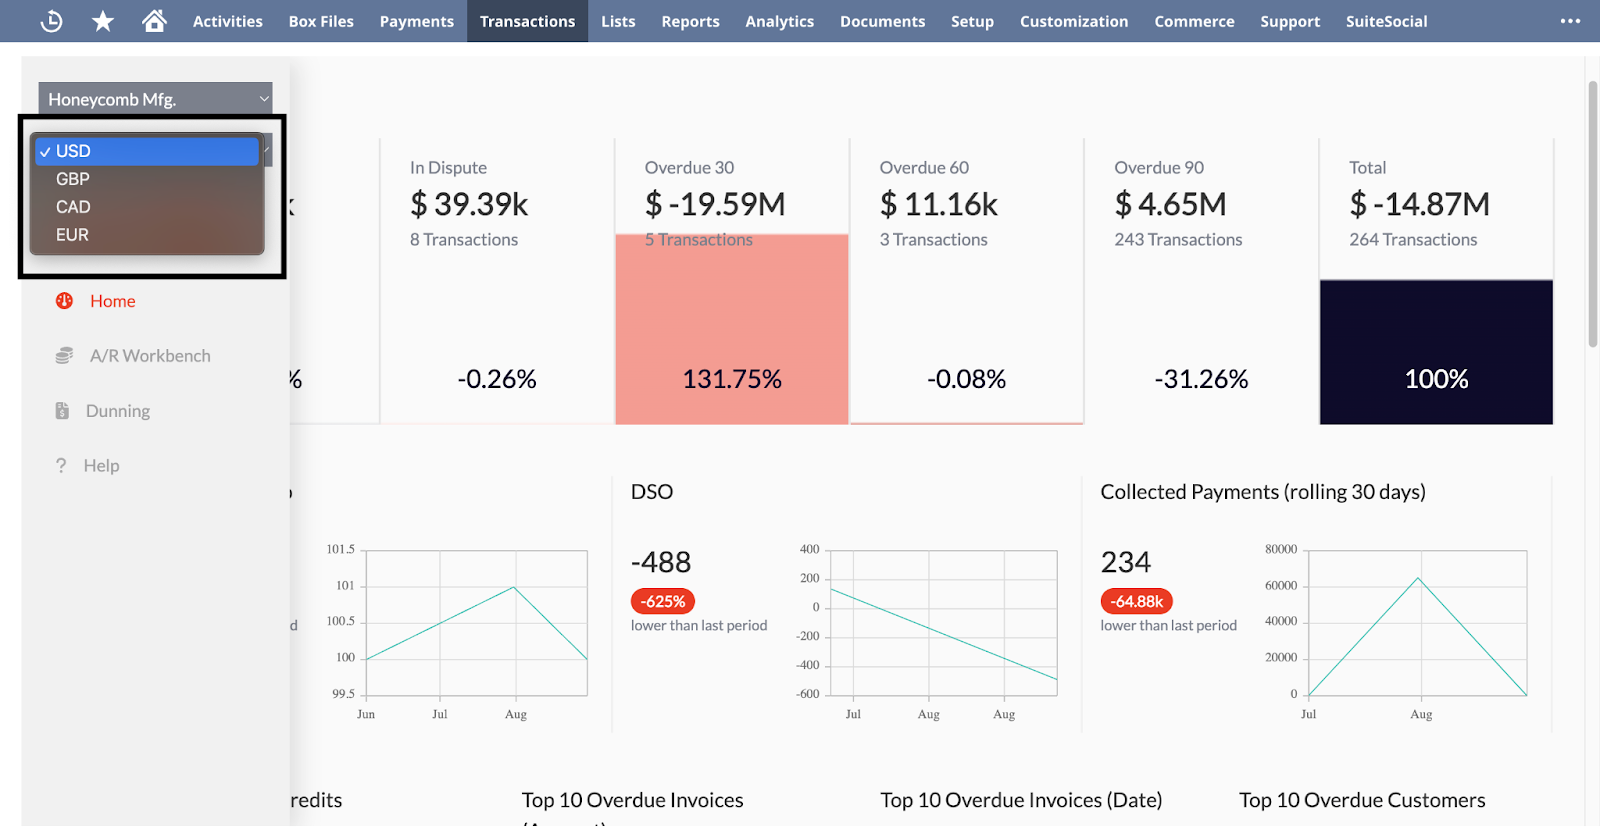
Multi-currency
Multi-Currency users have the option of changing currencies in the sidebar.
A/R Funnel (A/R Post Home Dashboard)
A/R Funnel is the Home Dashboard of A/R Post. It displays user reports related to the Account/Receivables statuses present in NetSuite. It provides transaction statistics and graphical metrics.(i.e. Overdue ratio, DSO and Collected payments).
The main dashboard is separated into three sections:
- The A/R Funnel
- This section shows your current A/R as of today broken down into groupings, total A/R, In dispute, Invoices overdue 30, overdue 60, overdue 90, total A/R.
- The second graph section
- This section has three important graphs to provide you some quick insights into your A/R.
- Example
- DSO (Days Sales Outstanding)
- Days sales outstanding is a calculation used by a company to estimate the size of their outstanding accounts receivable
- Collected Payments (Rolling 30 Days)
- This section has three important graphs to provide you some quick insights into your A/R.
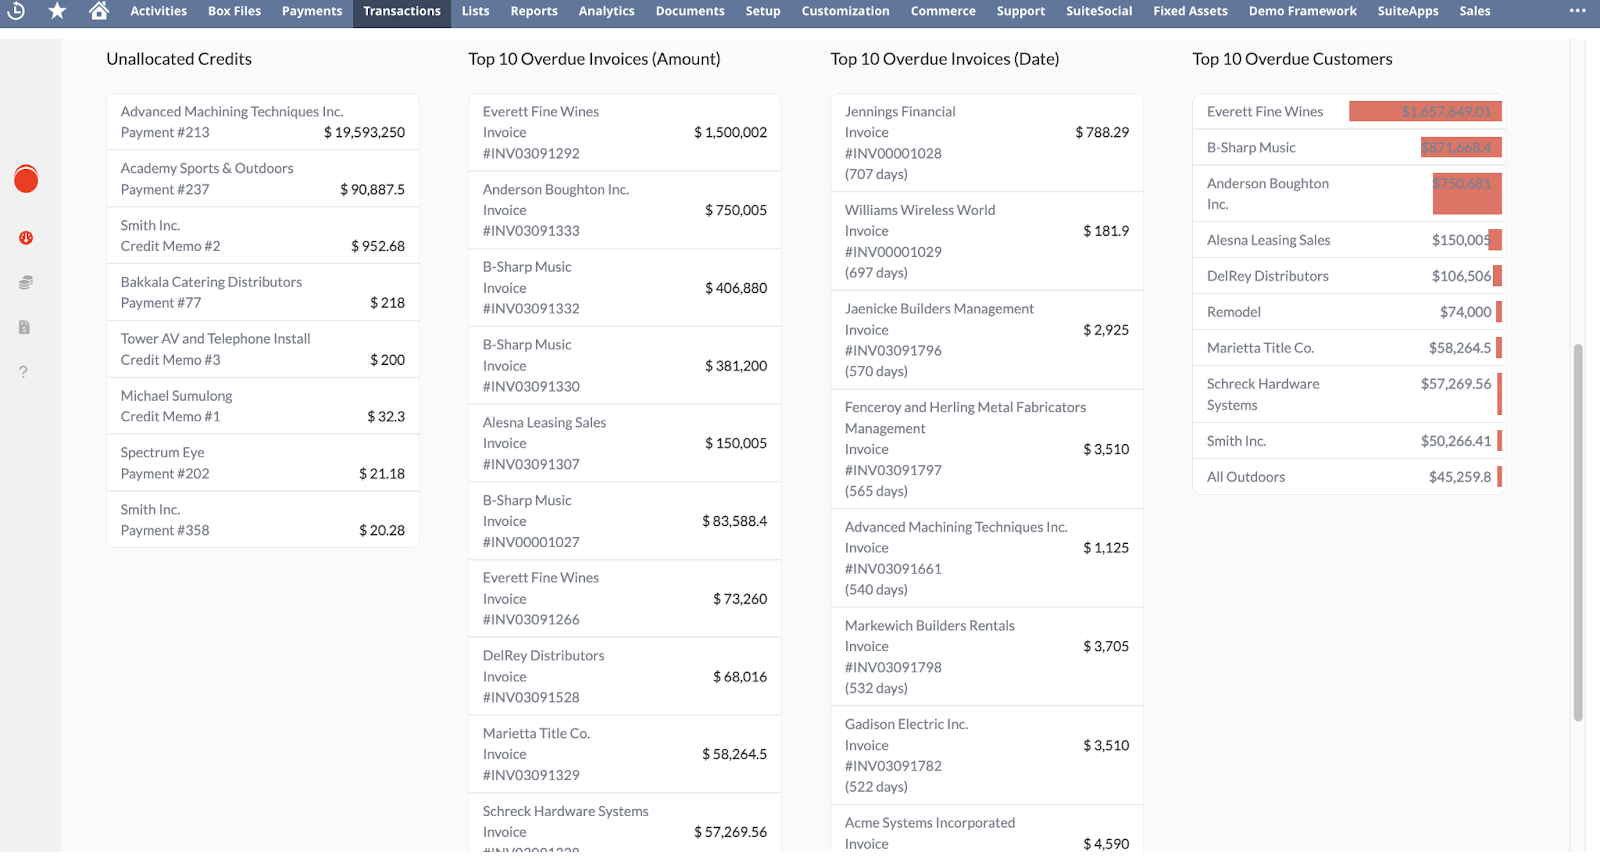
The bottom of the page has tables highlighting important information:
- Unallocated Credits
- Top 10 Overdue Invoices (Amount)
- Top 10 Overdue Invoices (Date)
- Top 10 Overdue Customers
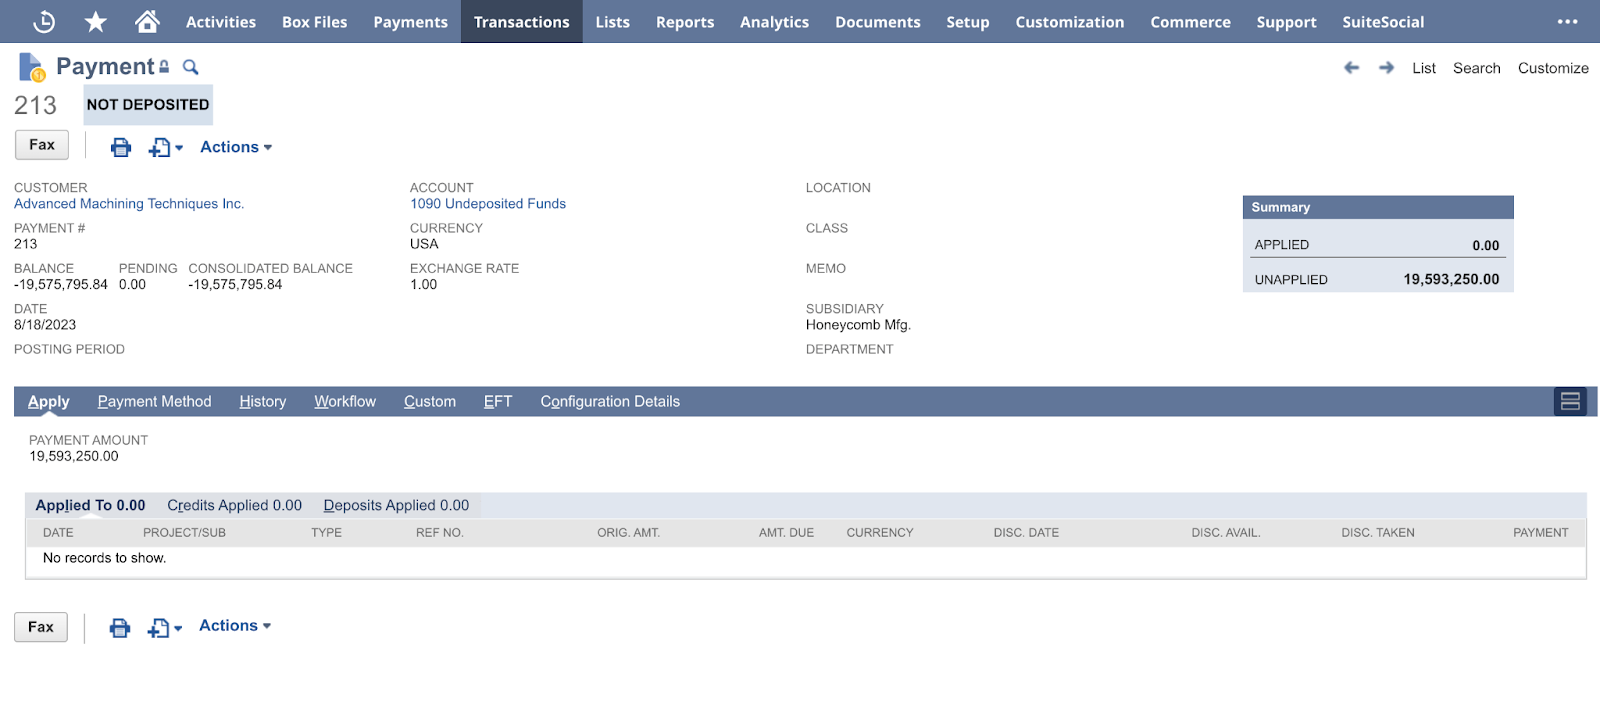
Unallocated Credits
Displays a list of unallocated credits in NetSuite.
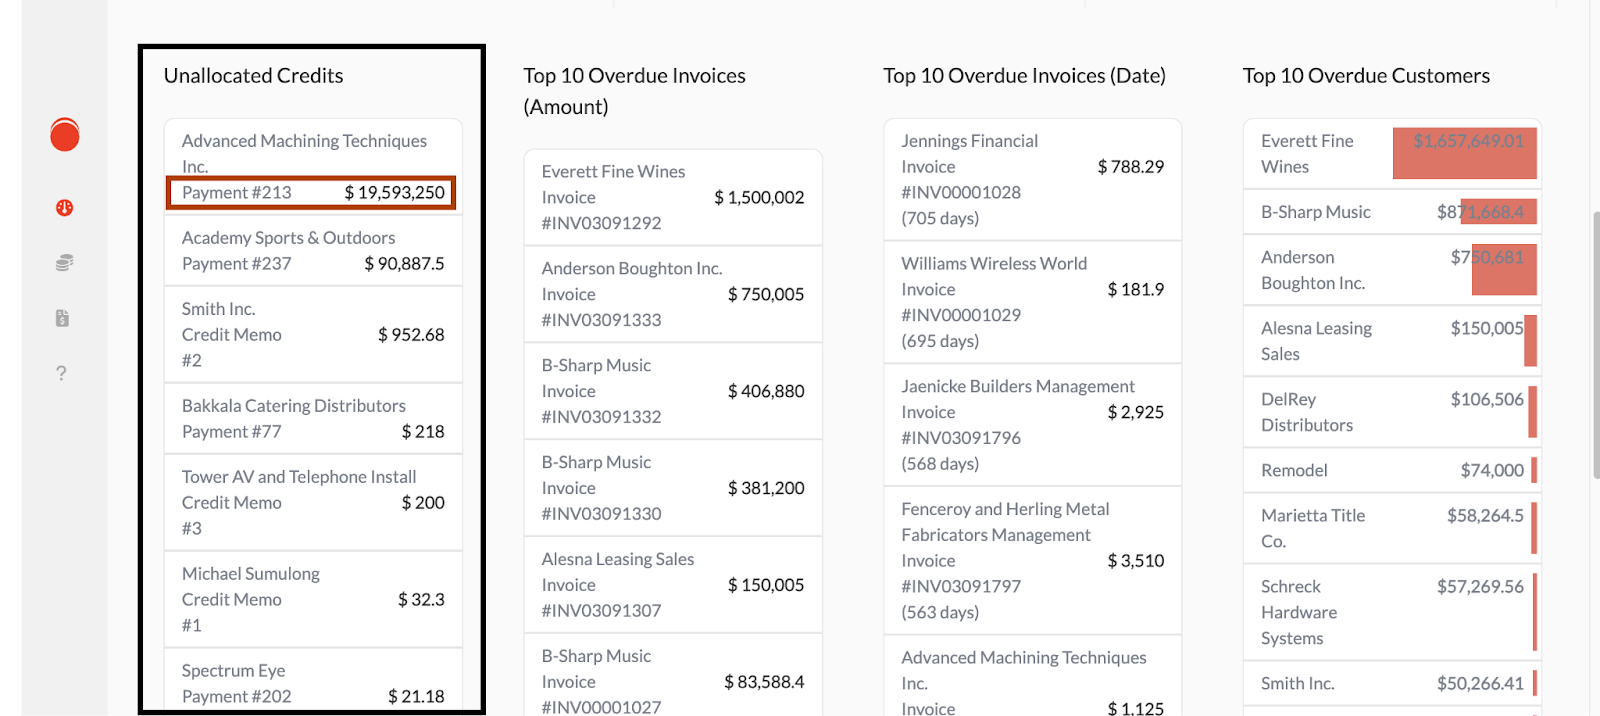
Clicking a transaction will redirect to the associated NetSuite transaction record.
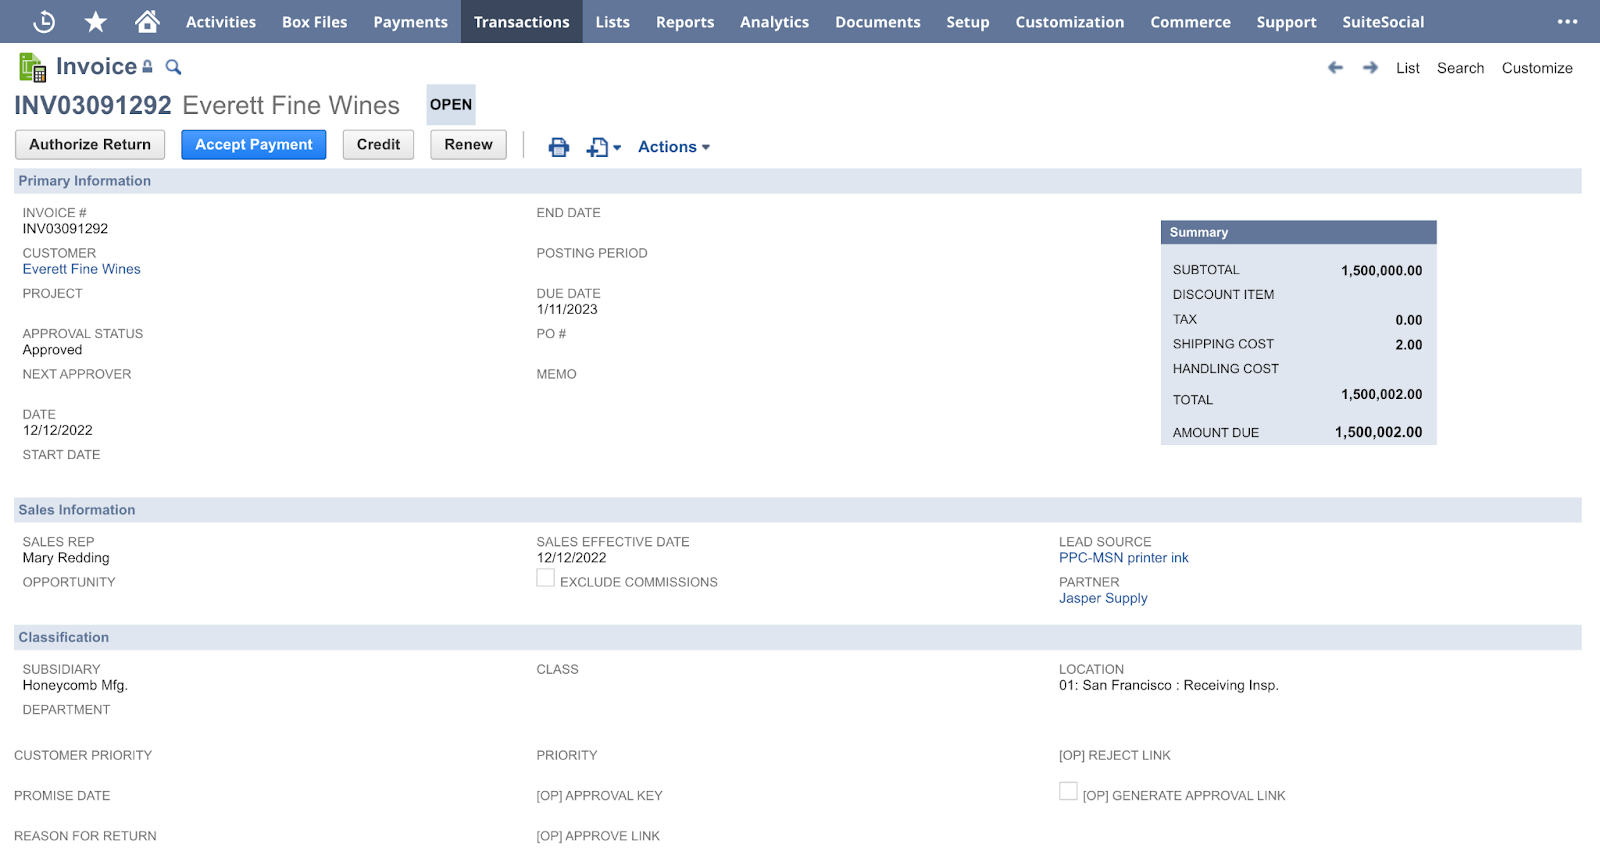
Top 10 Overdue Invoices(Amount)
Displays a list of the most overdue invoices in NetSuite, sorted by amount.
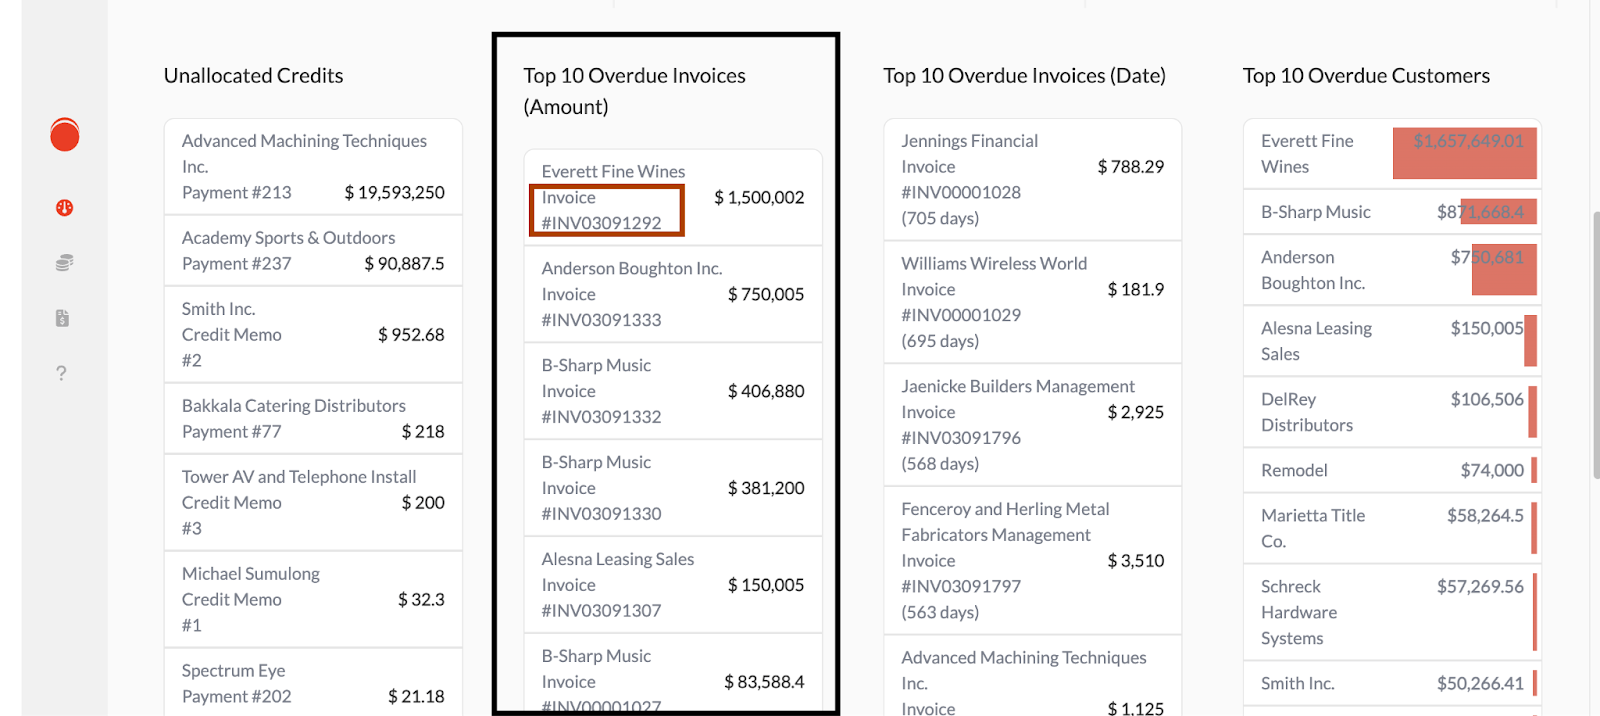
Clicking an invoice will redirect to the associated NetSuite invoice record.
Top 10 Overdue Invoices (Date)
Displays a list of the most overdue invoices in Netsuite, sorted by date
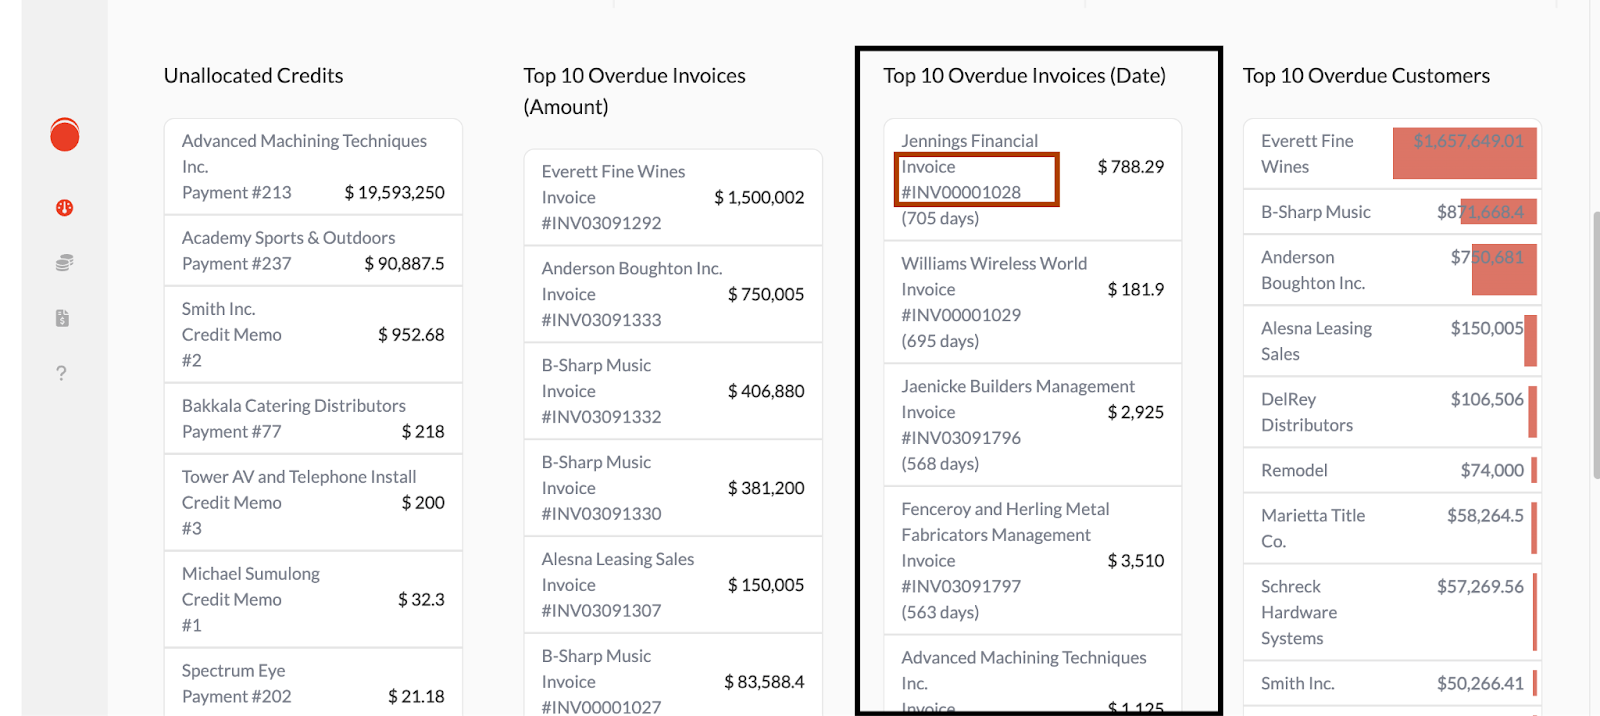
Clicking an invoice will redirect to the associated NetSuite invoice record.
Top 10 Overdue Customer
Displays a list of customers from NetSuite with the highest outstanding balance.
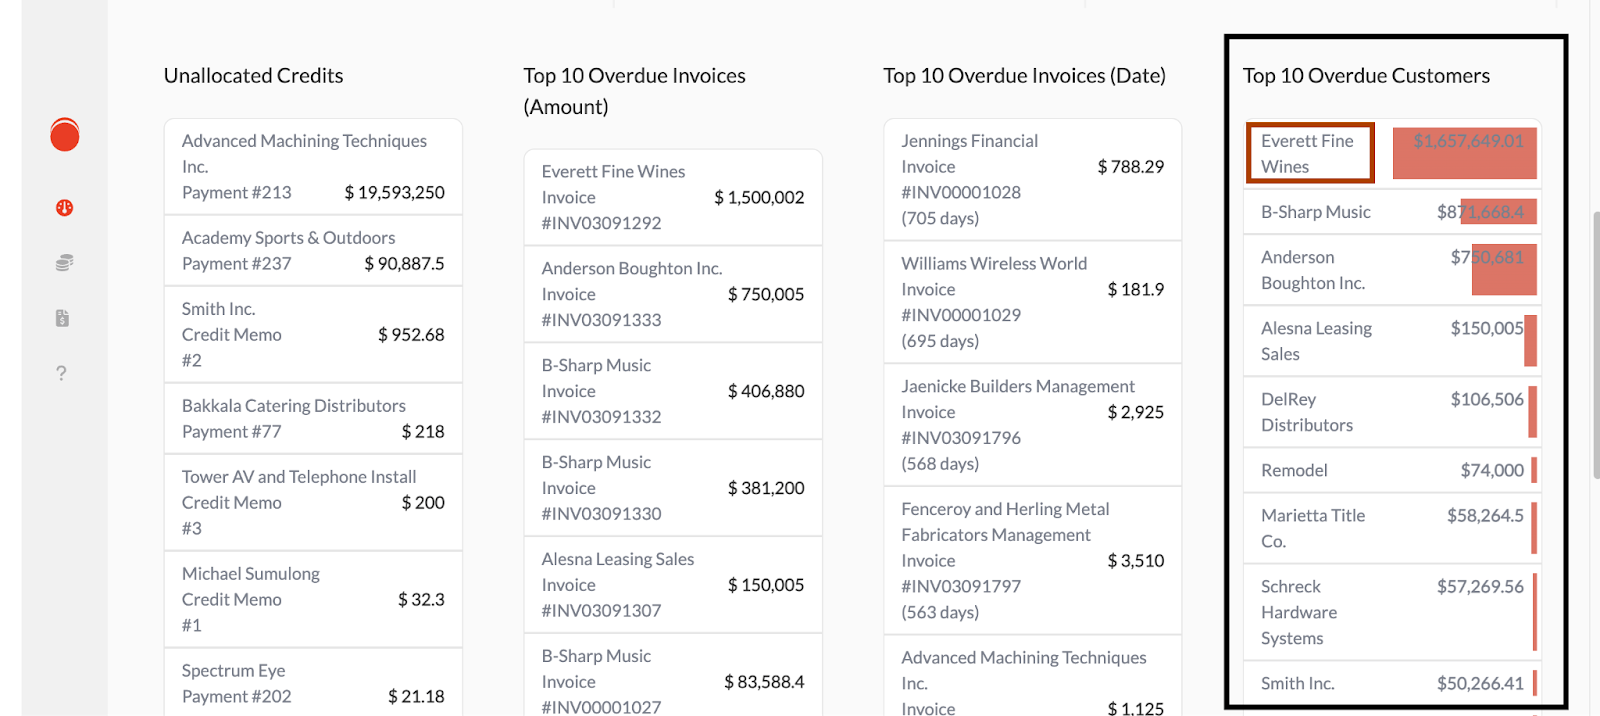
Clicking a customer will redirect to the customer’s details page in A/R Post.
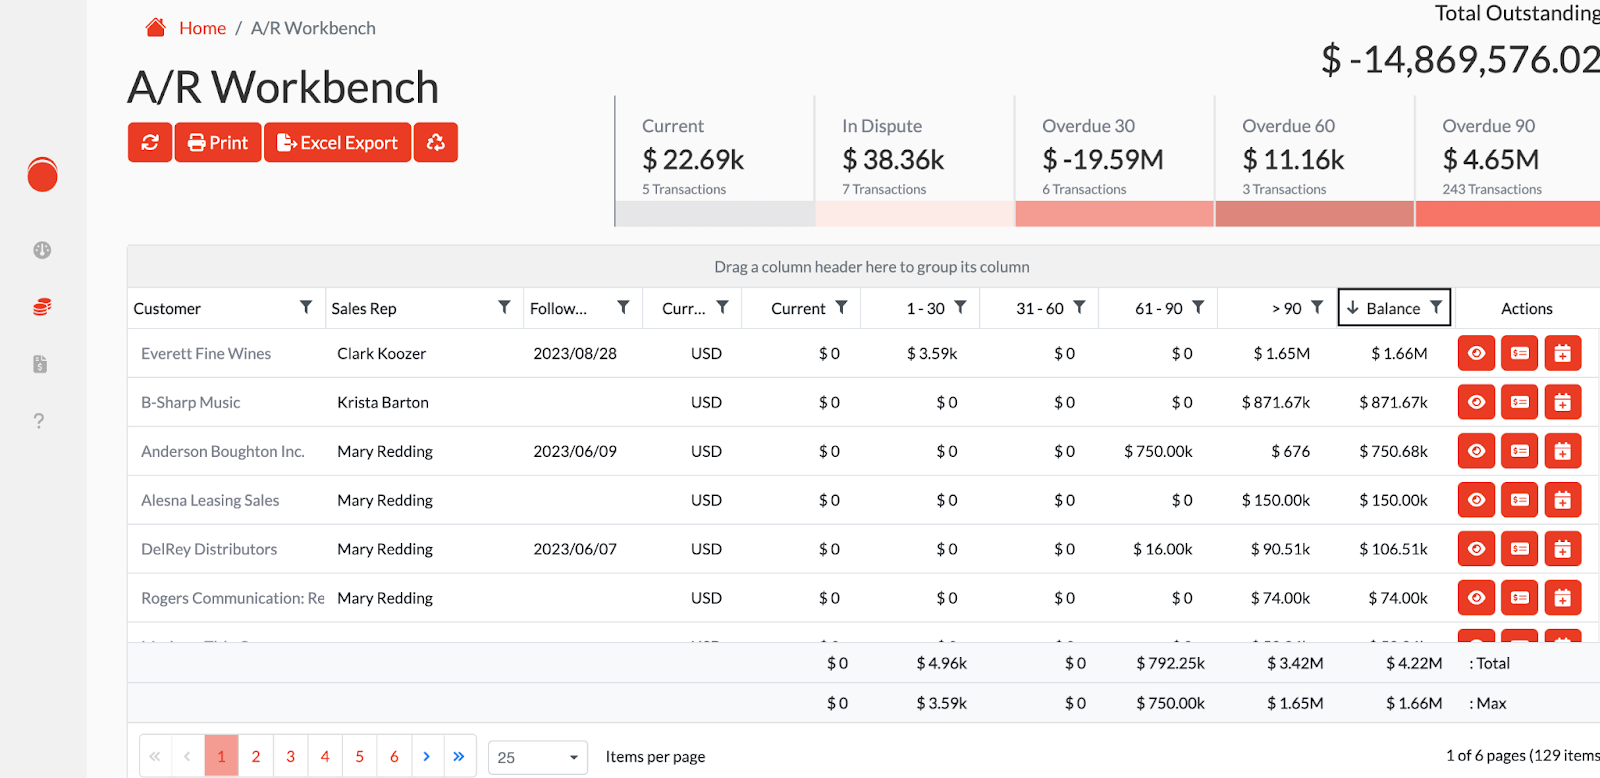
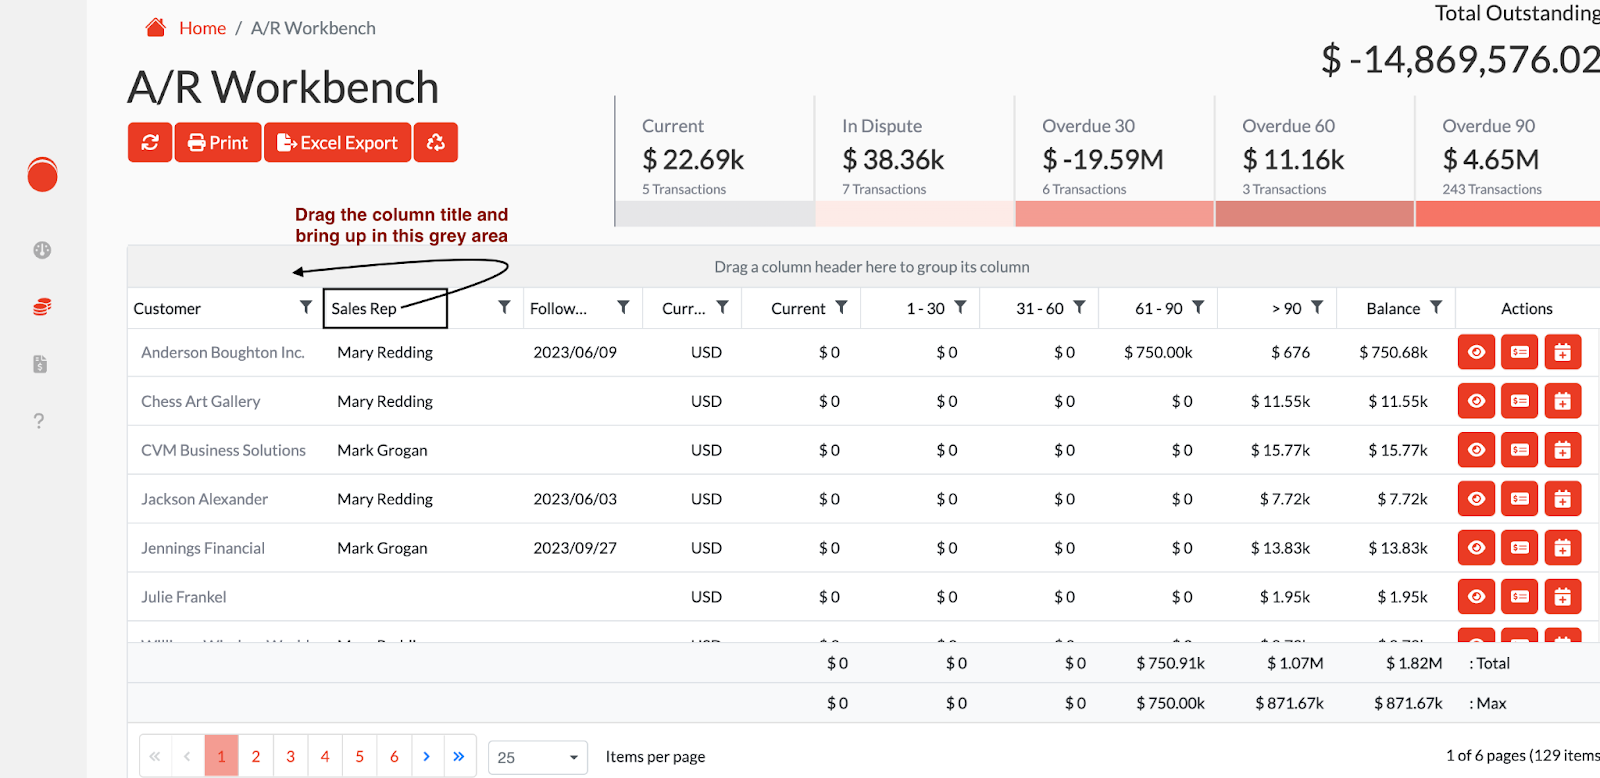
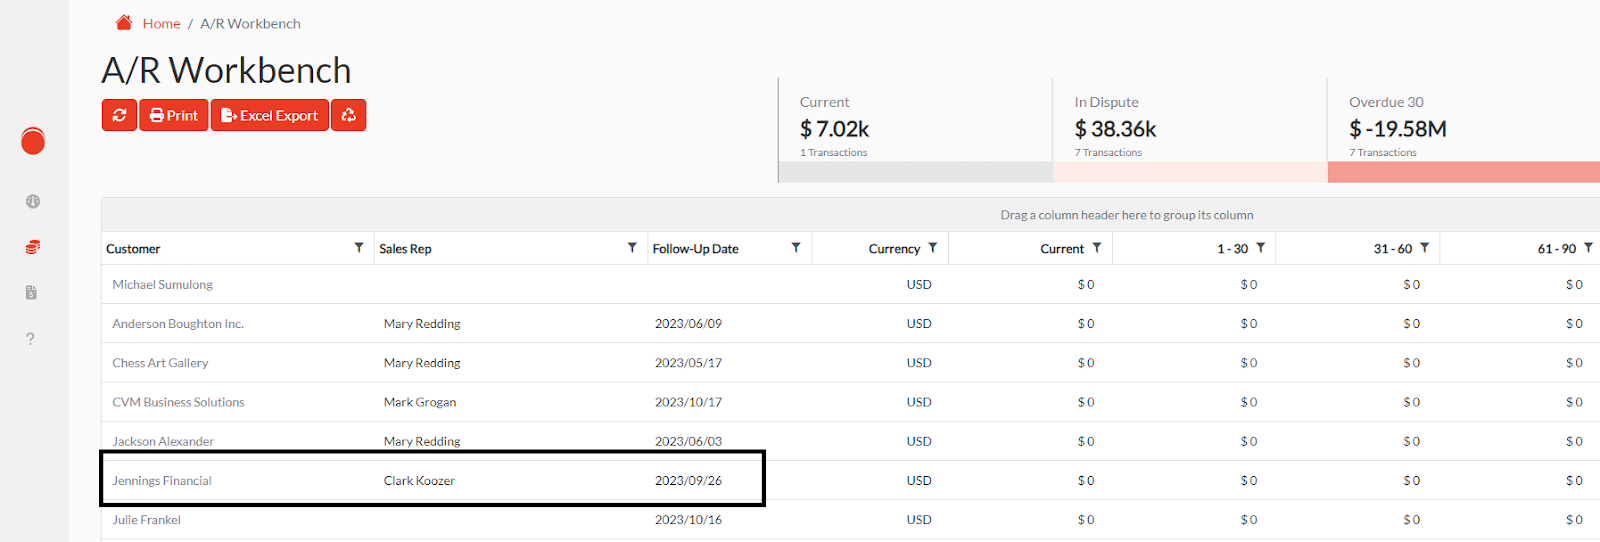
A/R WorkBench
The A/R WorkBench contains detailed A/R aging information. The table displays Customer’s outstanding balances, total balance, follow up dates, and different classifications are seen with transactions in dispute. Transactions overdue by 30, 60, and 90 days are categorized.
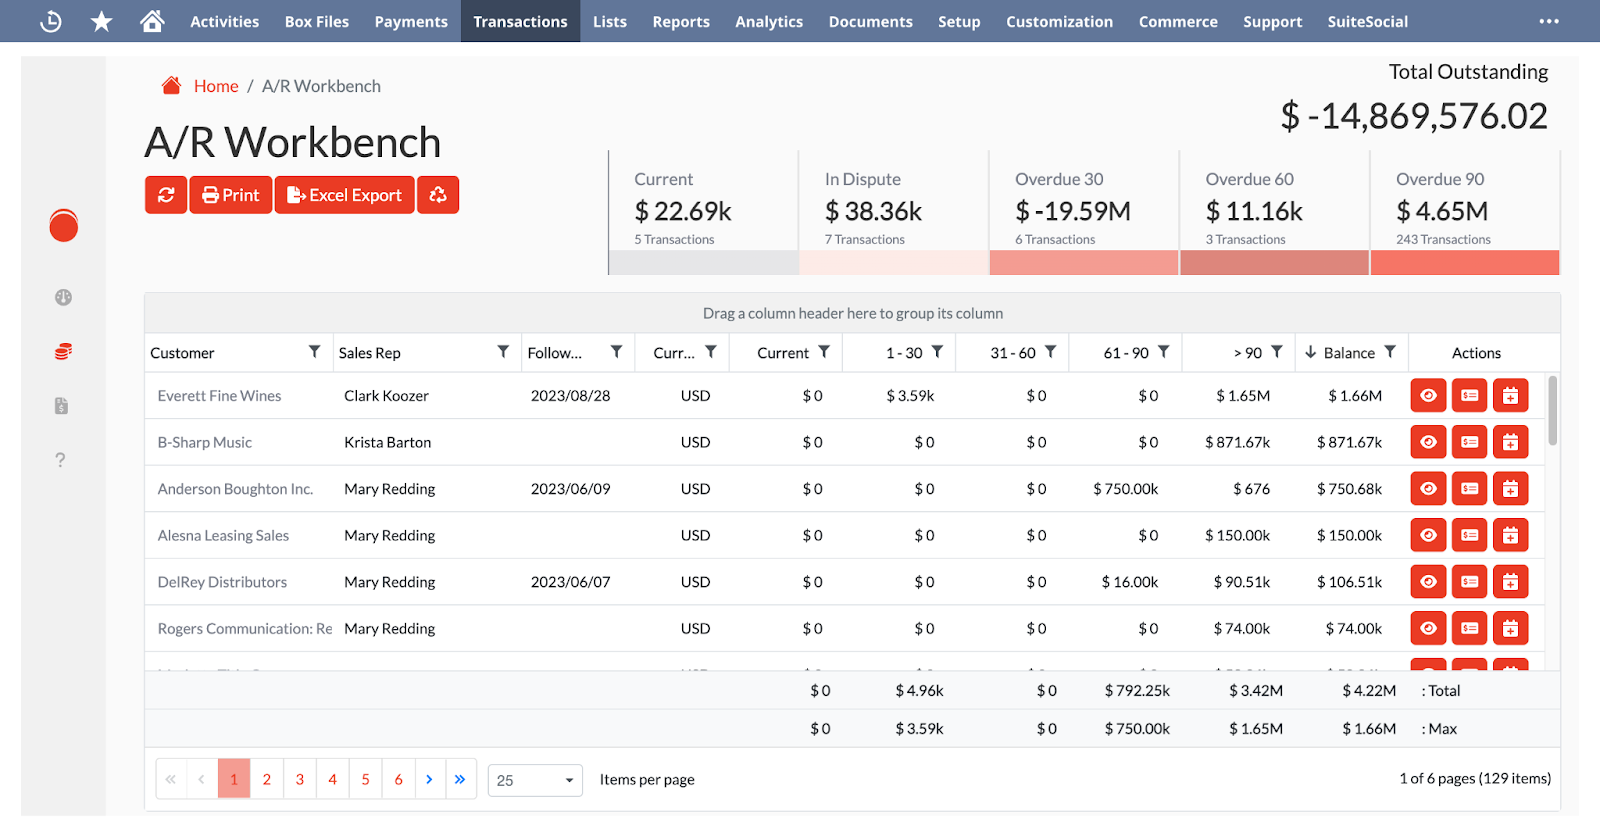
The “Print” button will print the table to a PDF format.
The “Excel Export” button will export the table to an xlsx file which can be opened in Excel.
The first button, the Refresh icon, will refresh the table with the newest data from NetSuite.
The last button, the Clear Cache icon, will refresh the table as well as remove any filters, sorts, and groups.
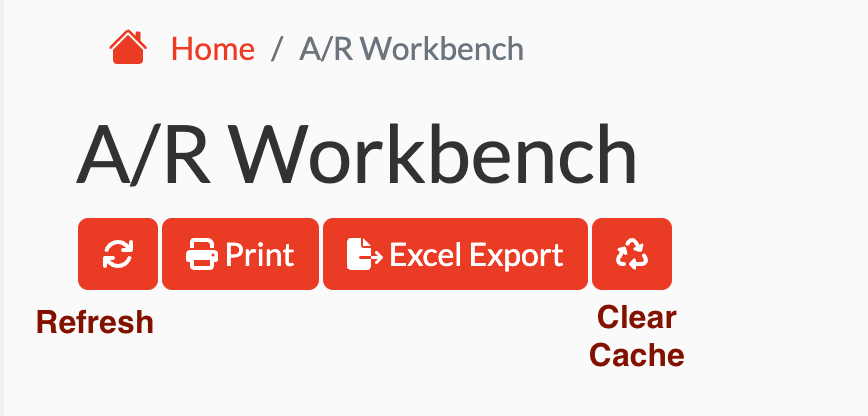
Each table row has three actions that can be performed. The buttons are on the far right side of each row.
From left to right:
View Details
Record Payment
Add Follow-Up
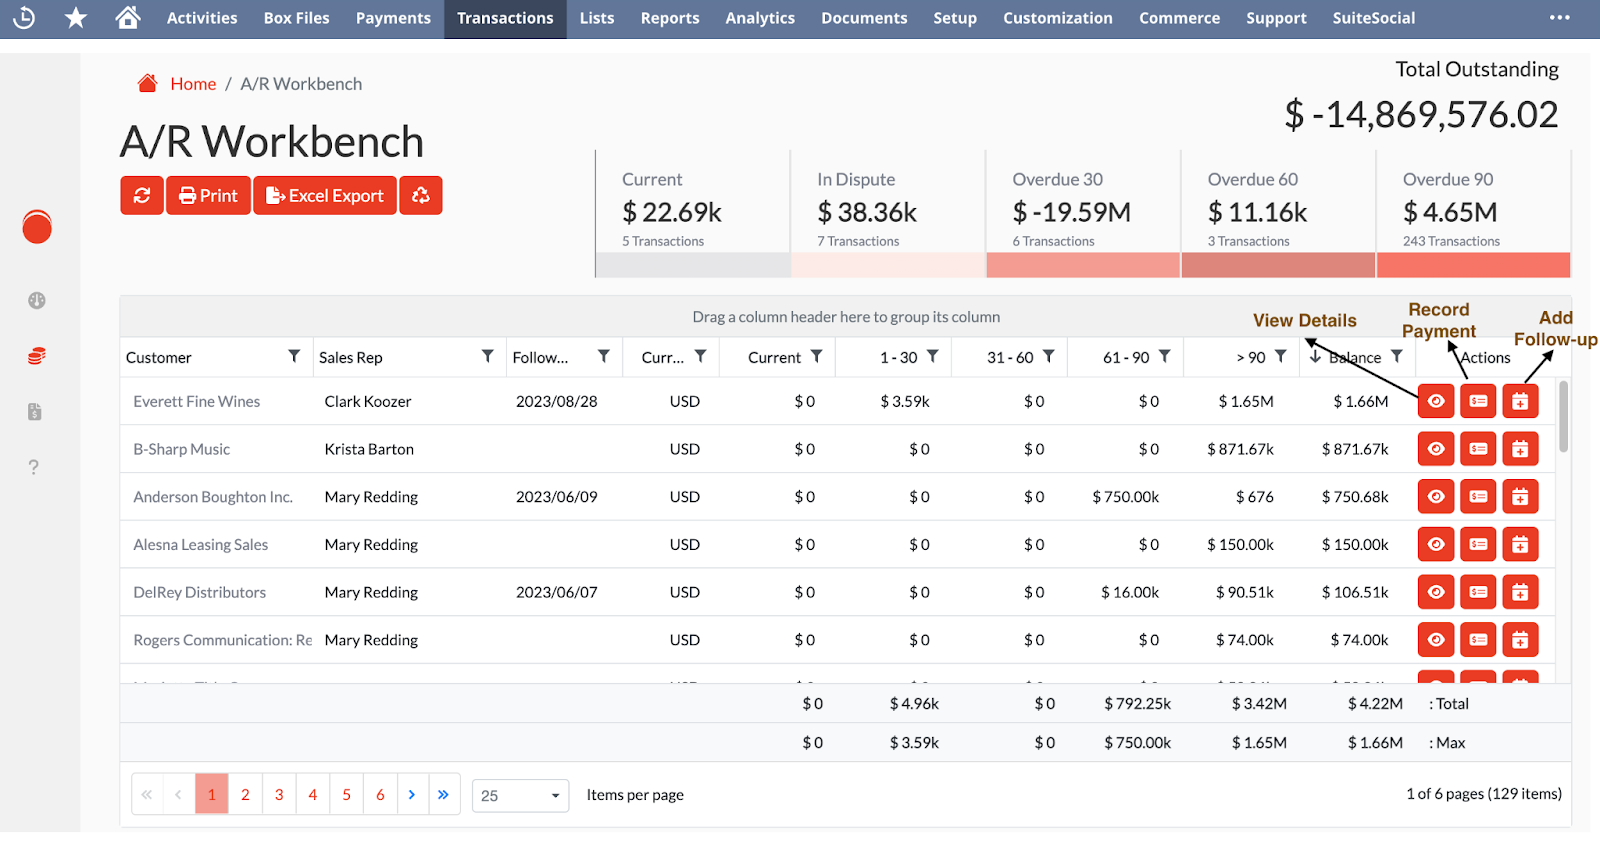

Clicking the View Details icon will open the customer details.
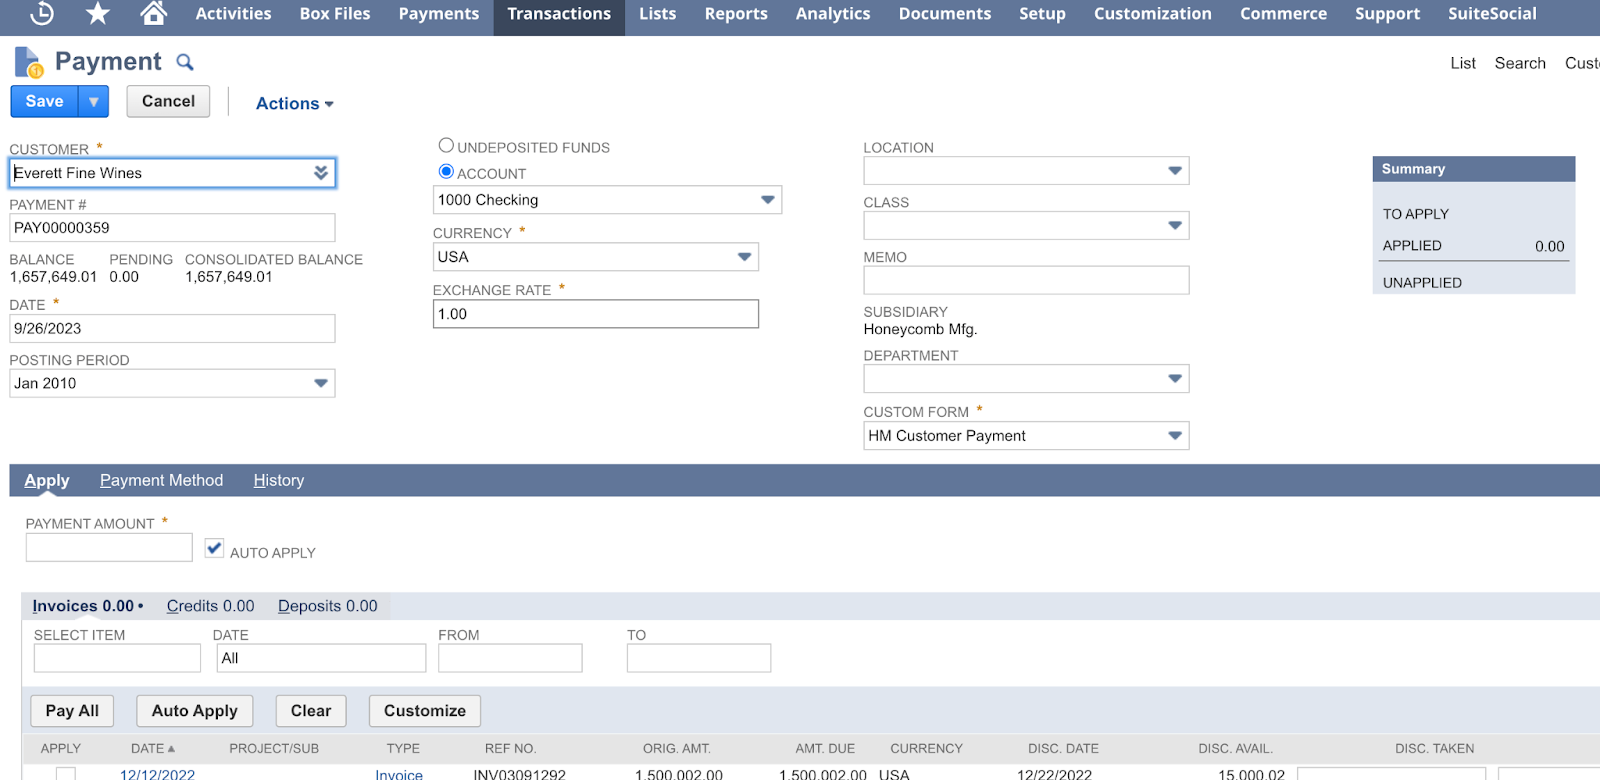
Clicking the Record Payment icon will redirect to the Netsuite Payment form.
The Add Follow-up icon will redirect to the activities subtab to add a Note, Task or Phone Call.
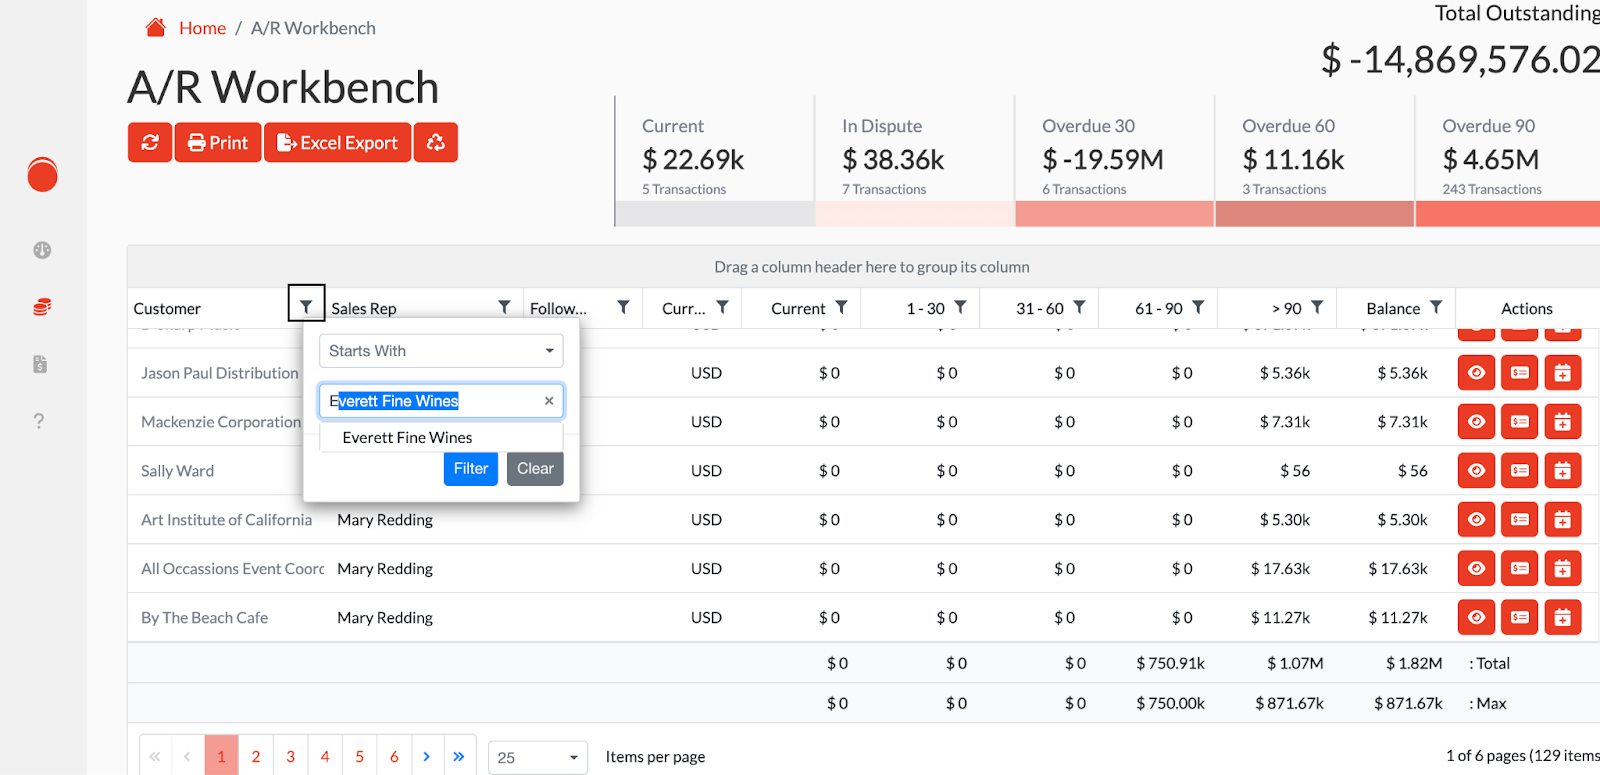
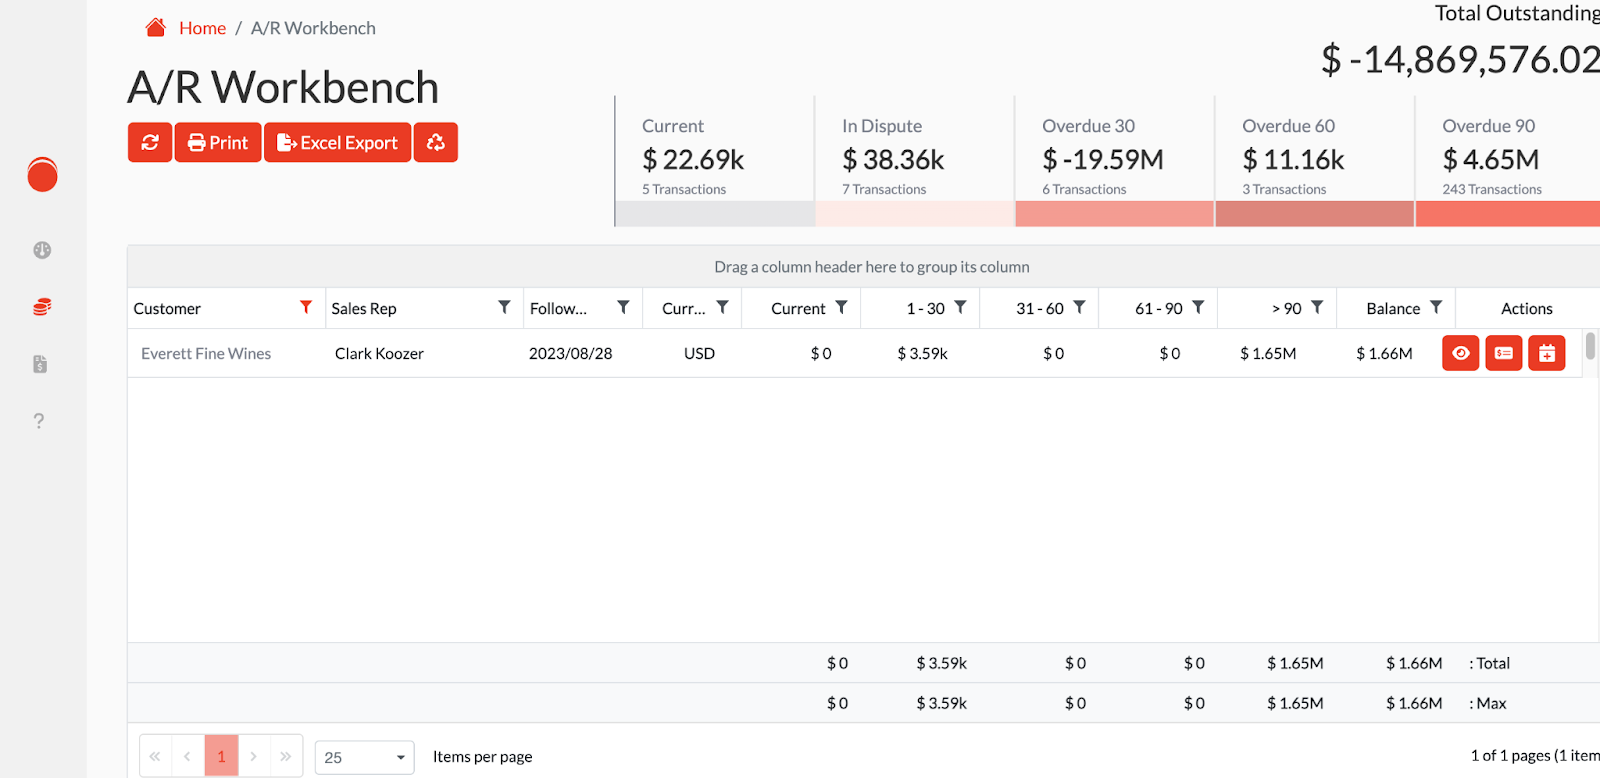
Filter
Filter the data by clicking the filter icon in the header of the columns. A number of different filters are available depending on the header. When filtering data, only data that follows the conditions will be displayed.
Sort
Sort the data by clicking the sort icon in the header of the columns. Columns can be sorted in ascending or descending order.

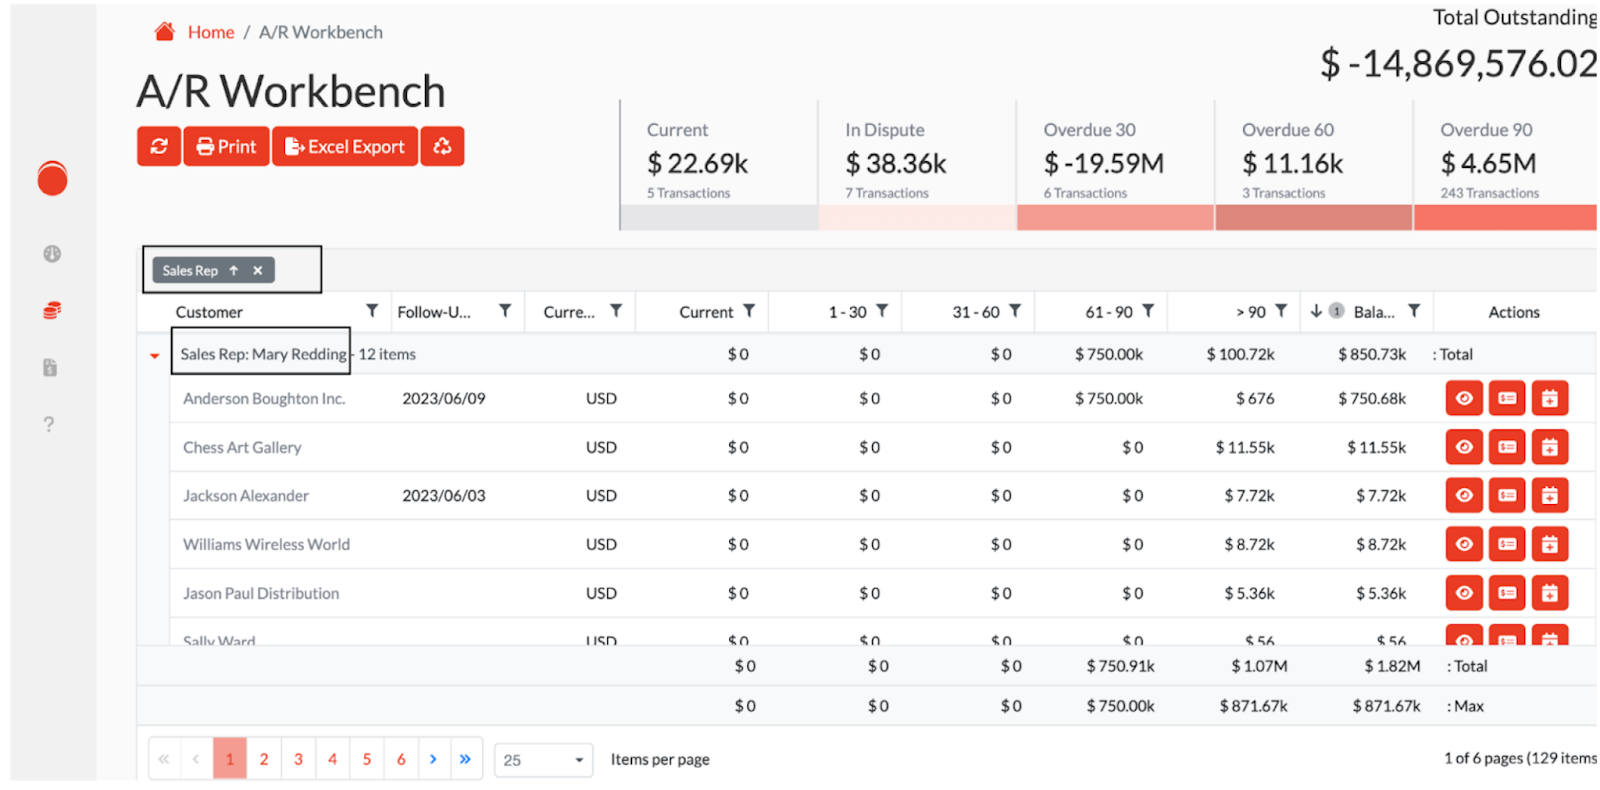
Group-By
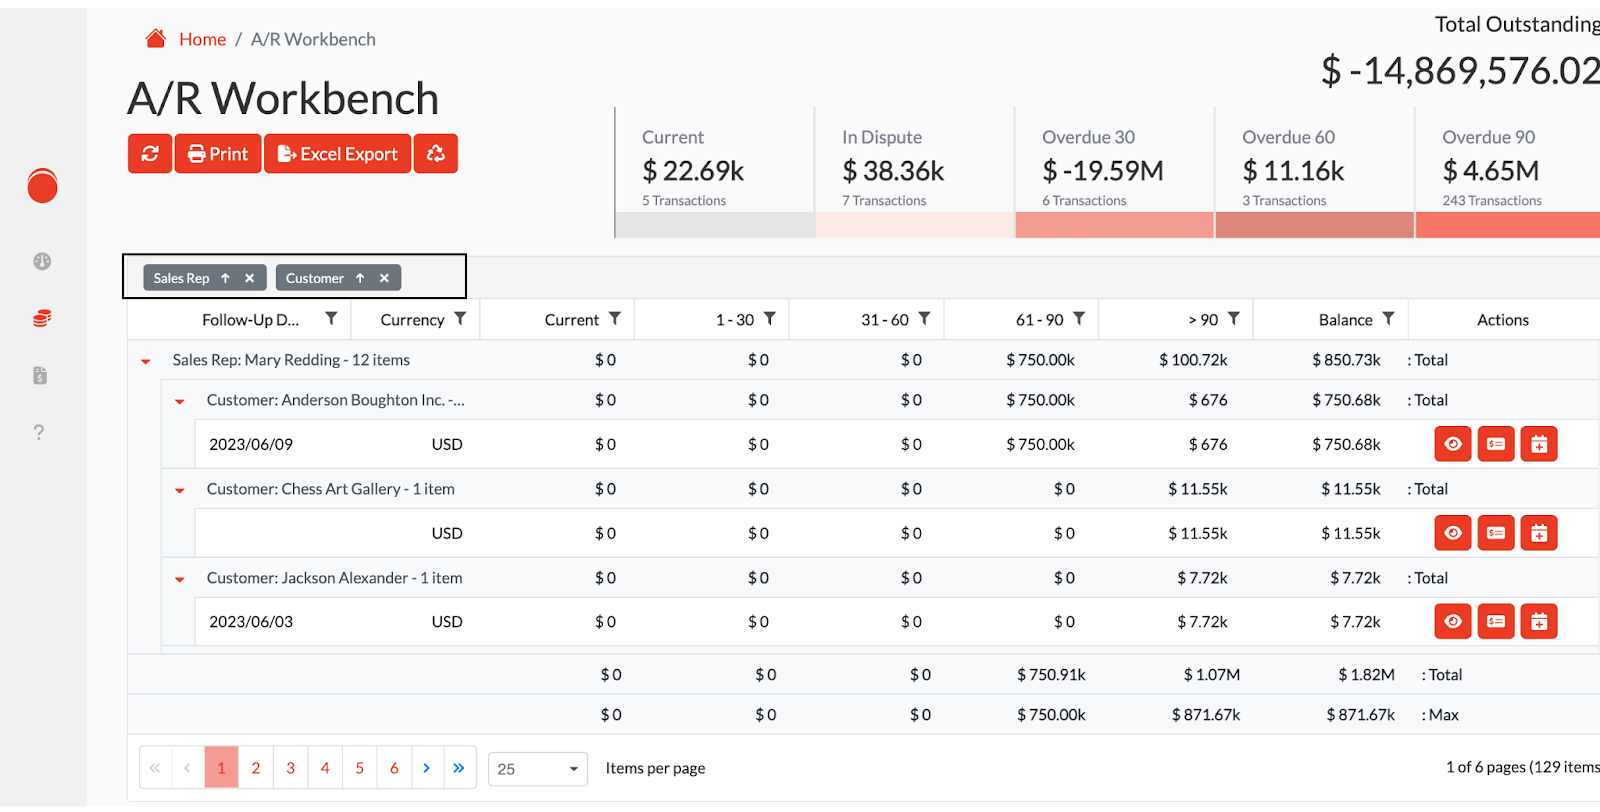
The option to group data according to values. Dragging the column header to the designated area, located above the table, will add it for grouping. Data can be grouped on a single value, or multiple values.
When grouping data, all data that has matching values for the selected header will be grouped together.
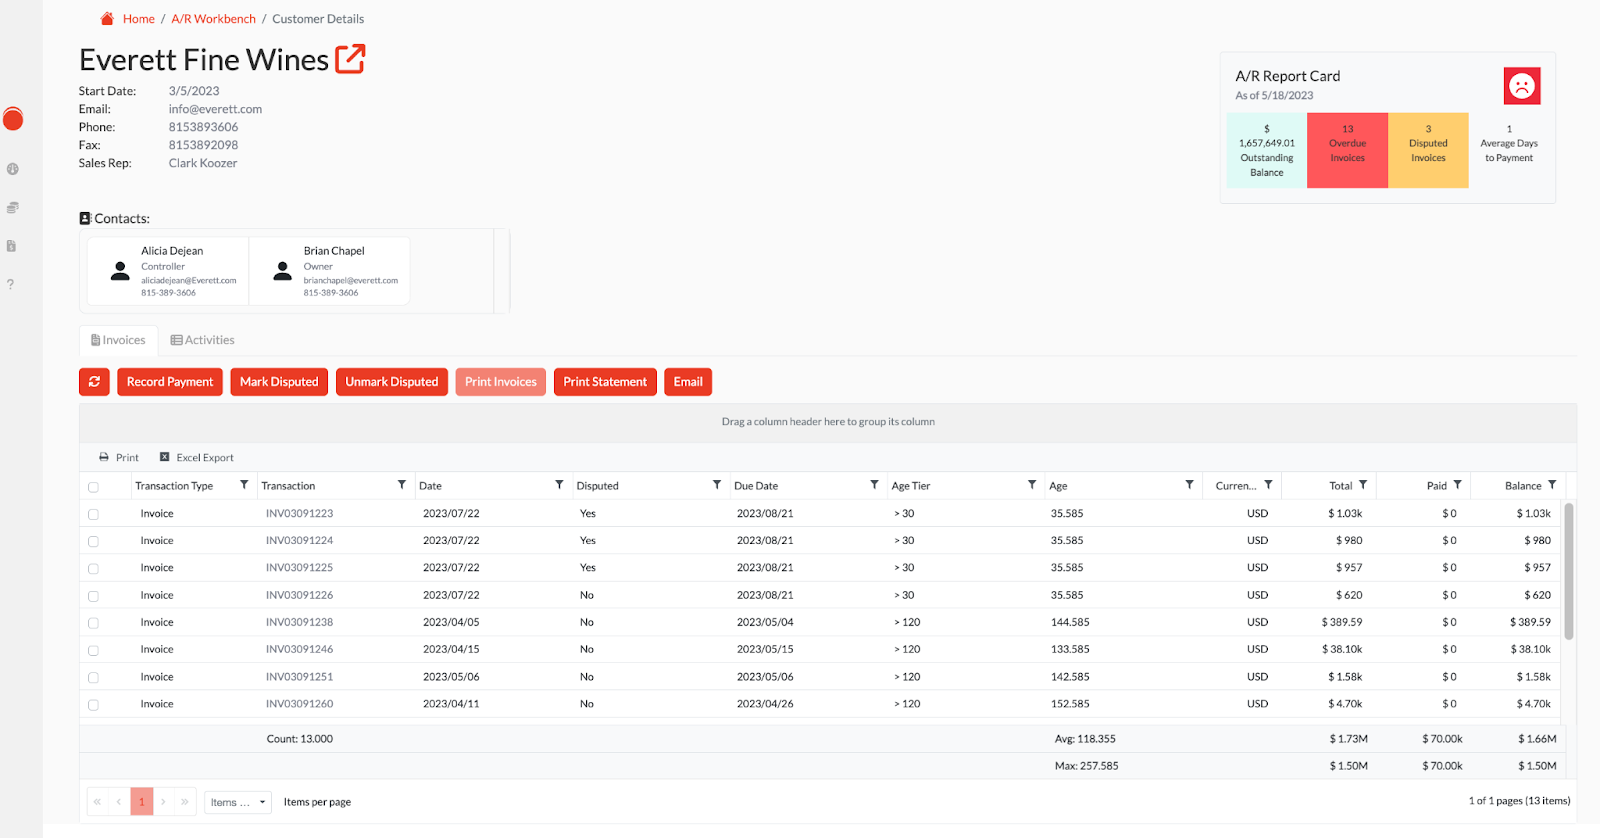
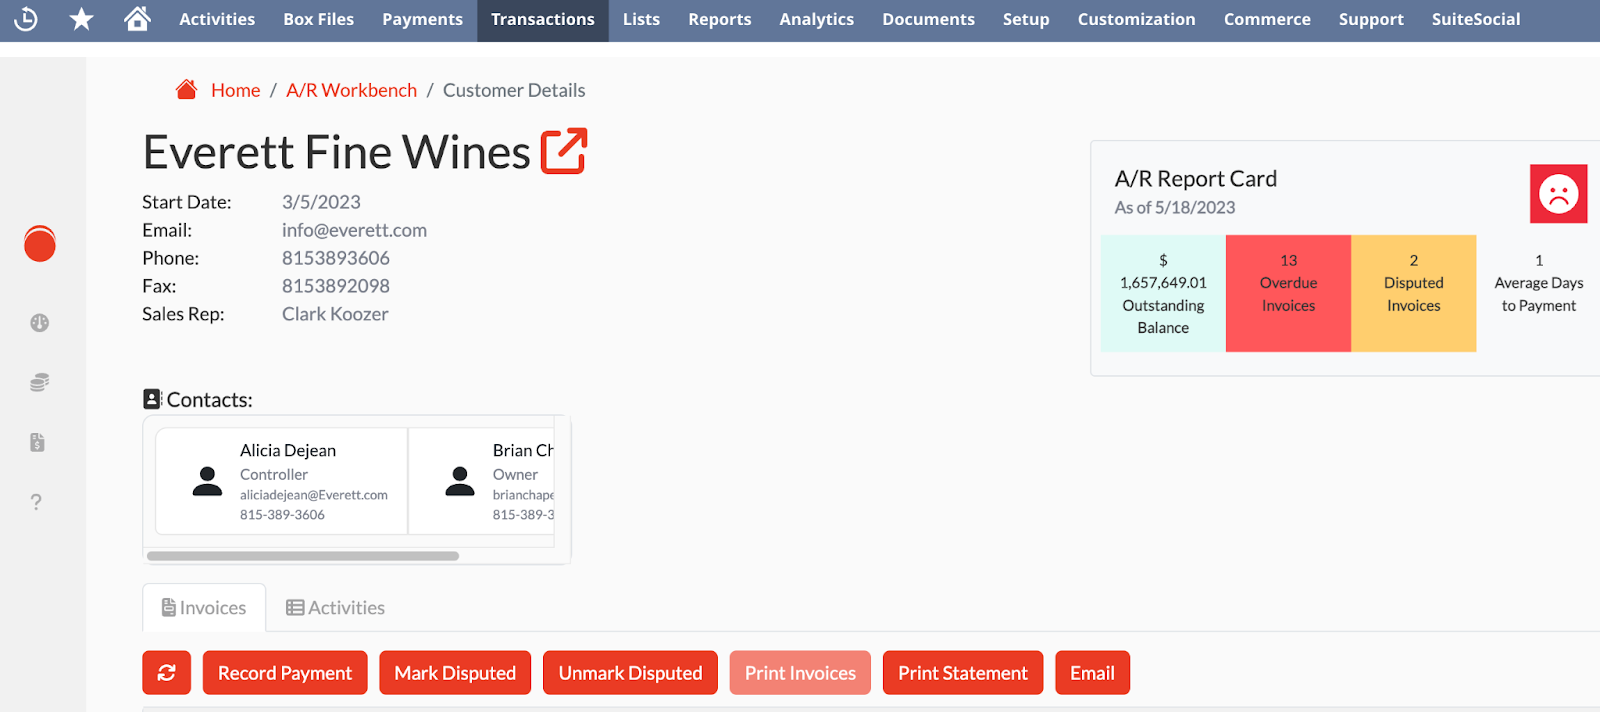
Customer Details Board
The Customer Details page contains information related to the Customer. The Report Card, Contact Information, Open Invoices, and Activities are displayed on the page.

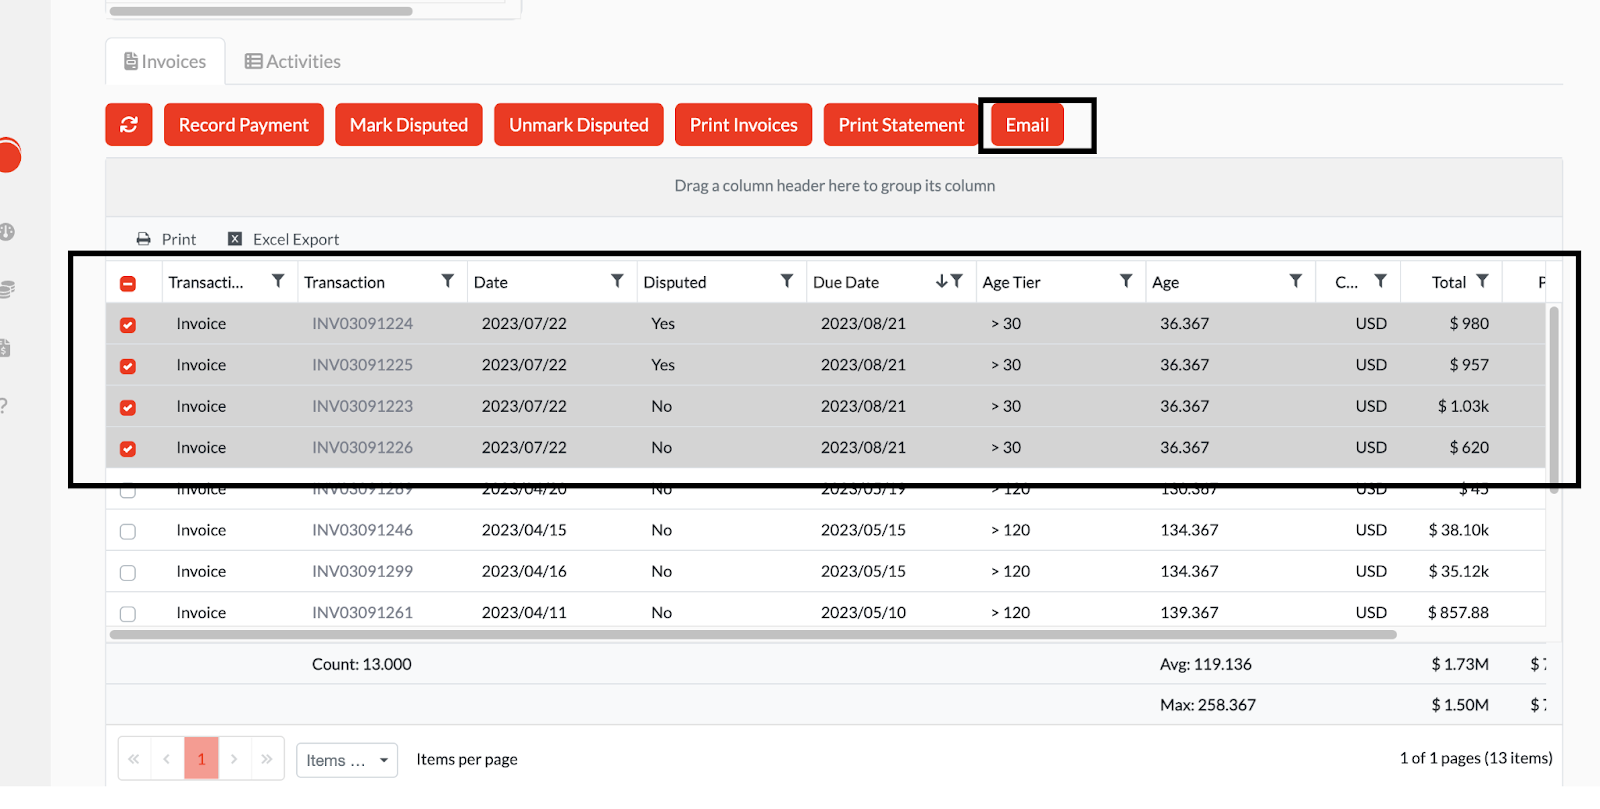
Working with the Invoices subtab
Mark/Unmark Disputed for the Invoice
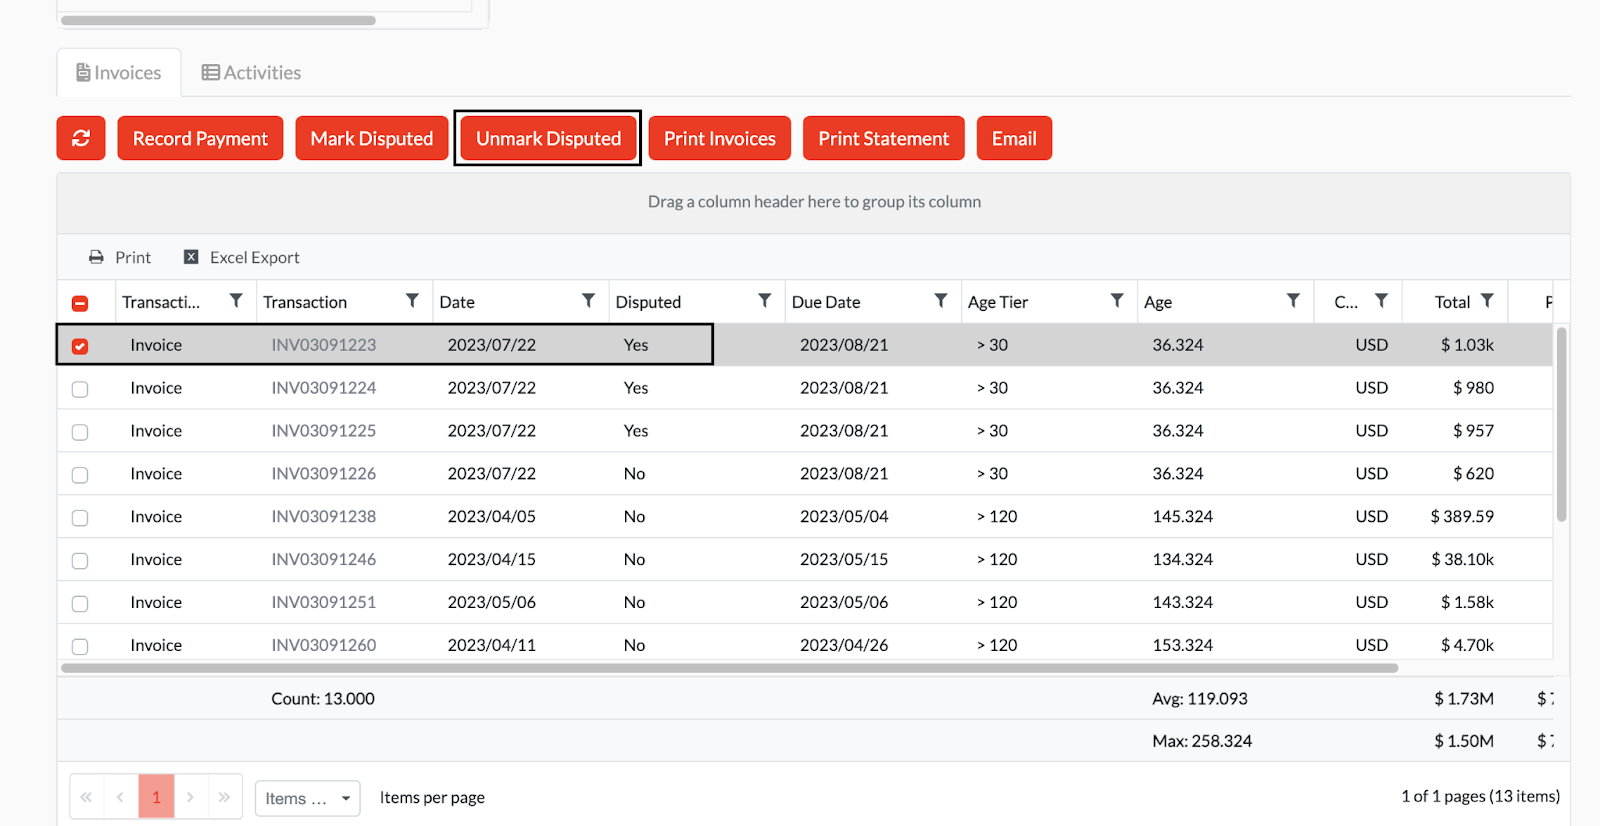
A/R Post offers a crucial feature for directly marking or unmarking disputed Invoices within the Customer Details Board.
Selecting invoices and clicking the “Mark Disputed” button will change the invoices to a disputed state.

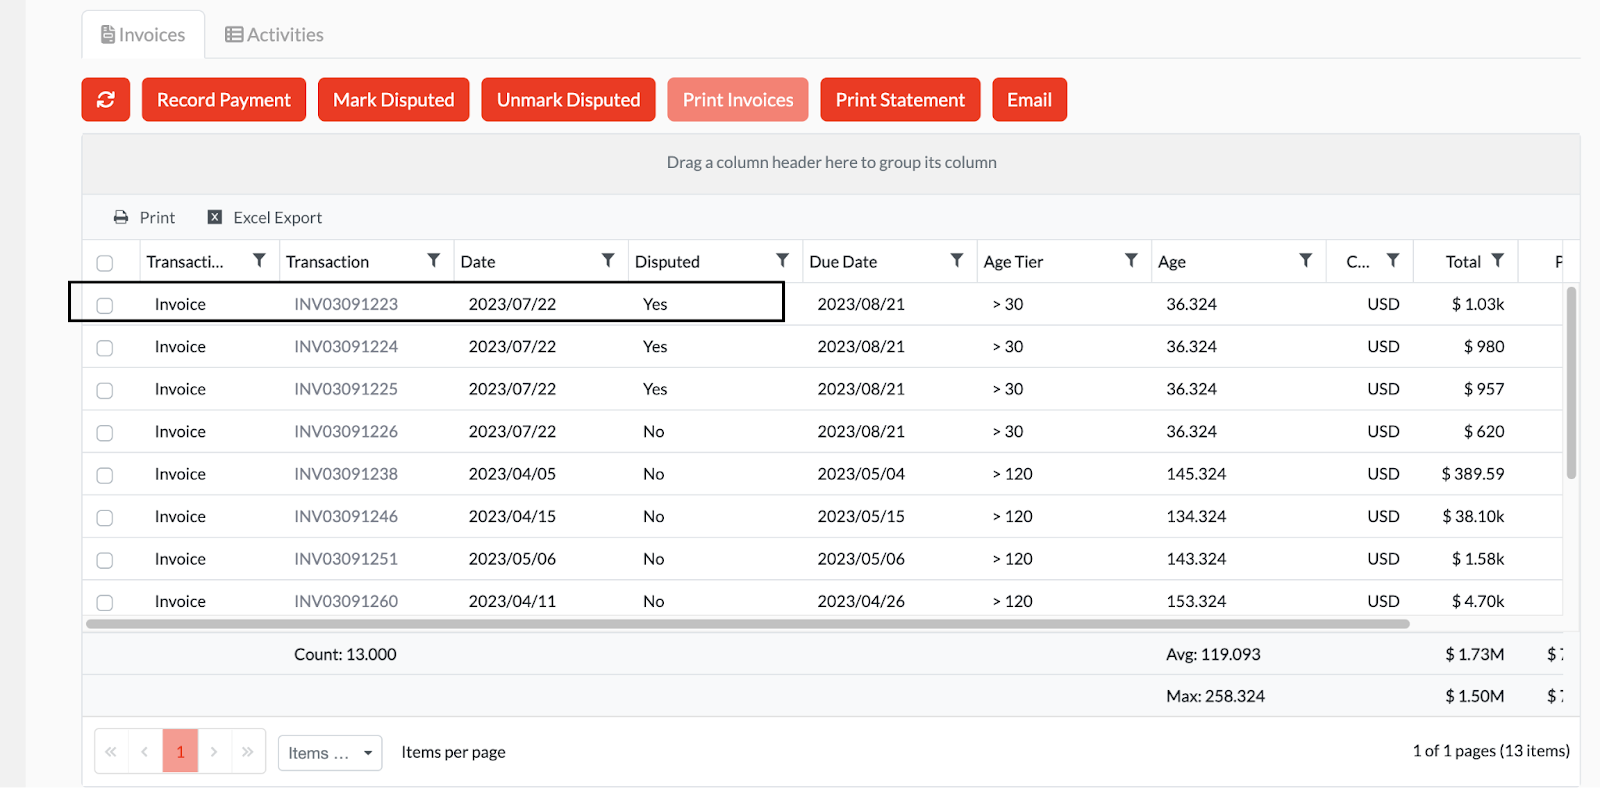
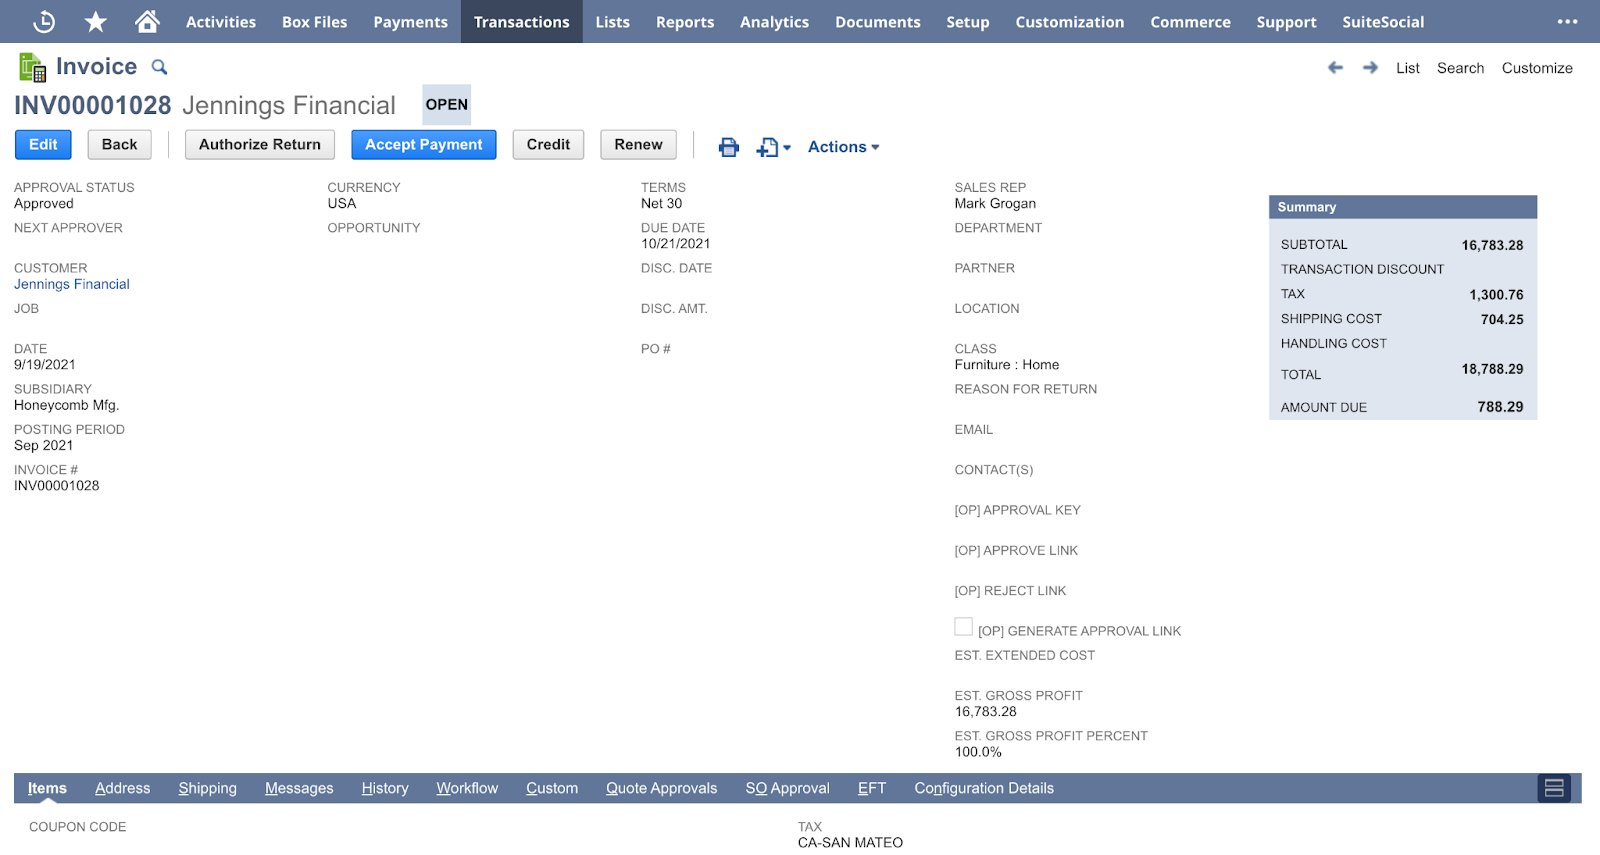
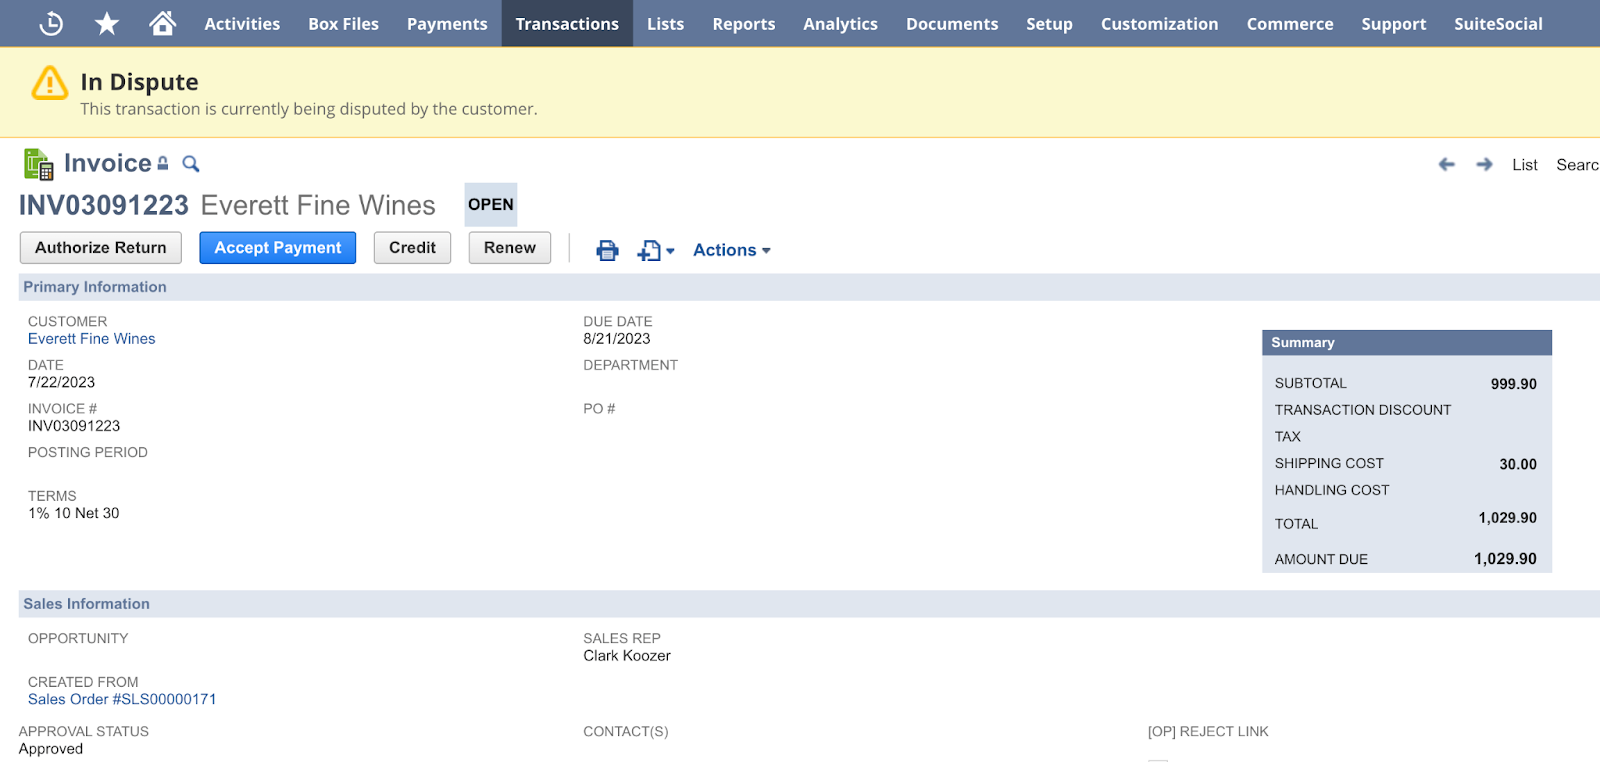
Clicking the invoice in the table will redirect to the associated NetSuite Invoice. The invoice will display a warning message that the transaction is in dispute.
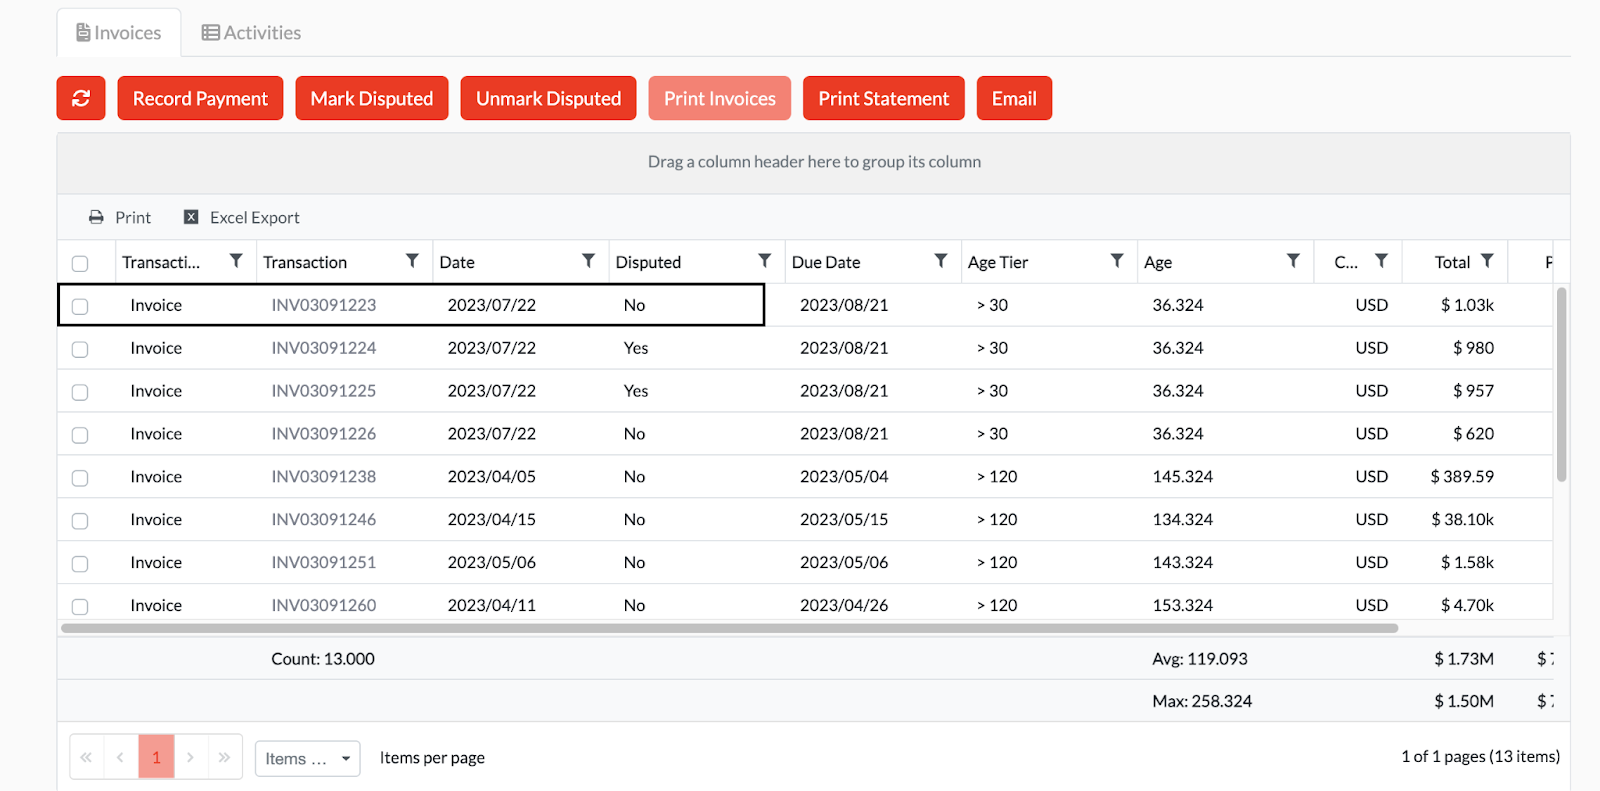
Invoices can be returned to an undisputed state by selecting disputed invoices and clicking the “Unmark Disputed” button.
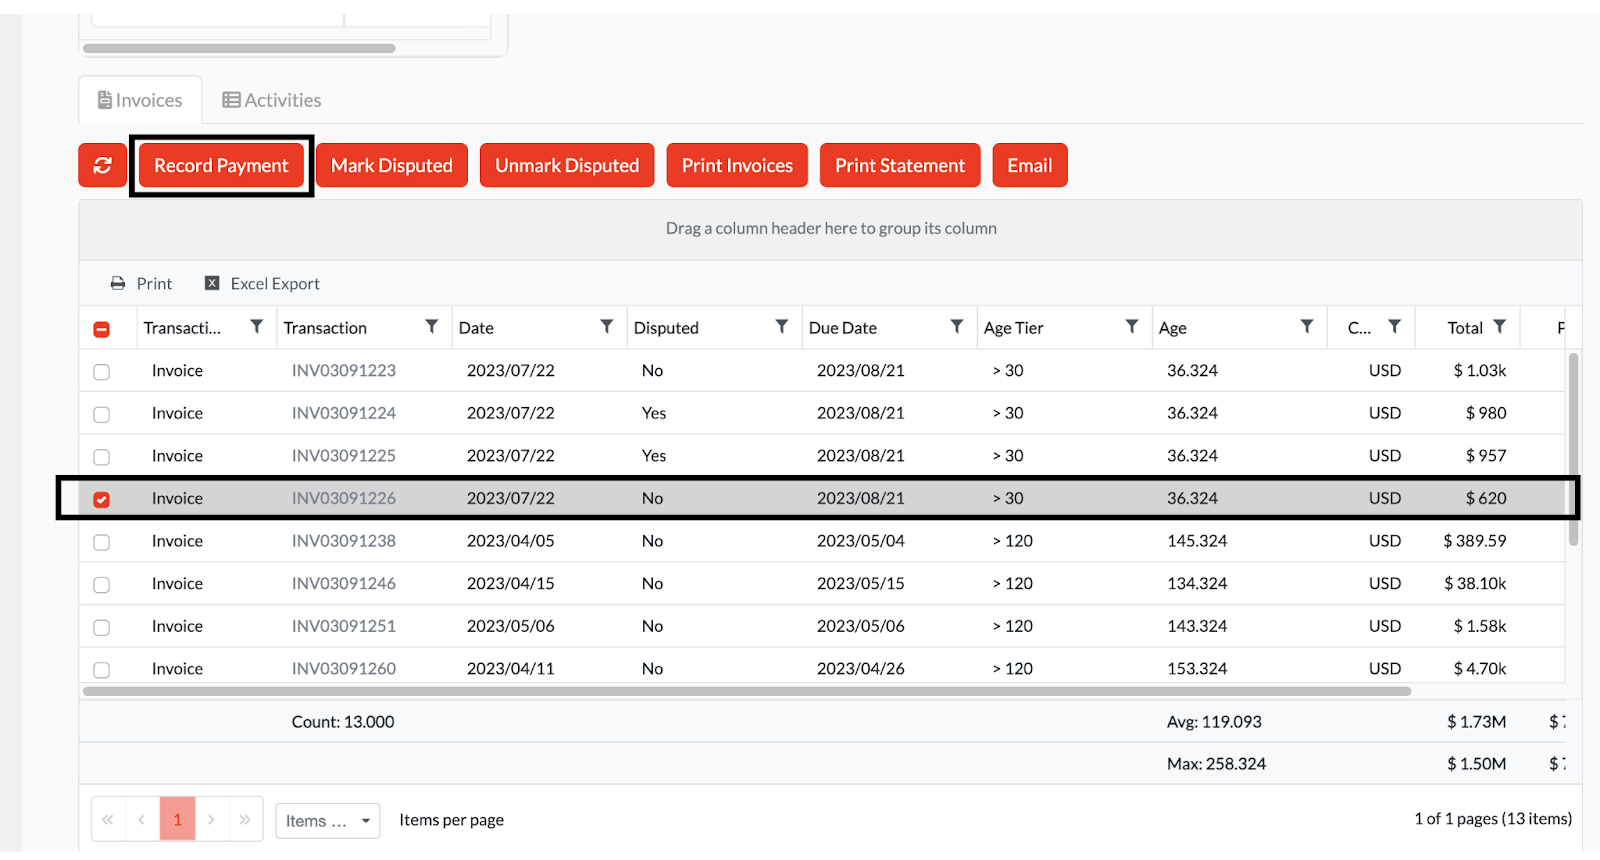
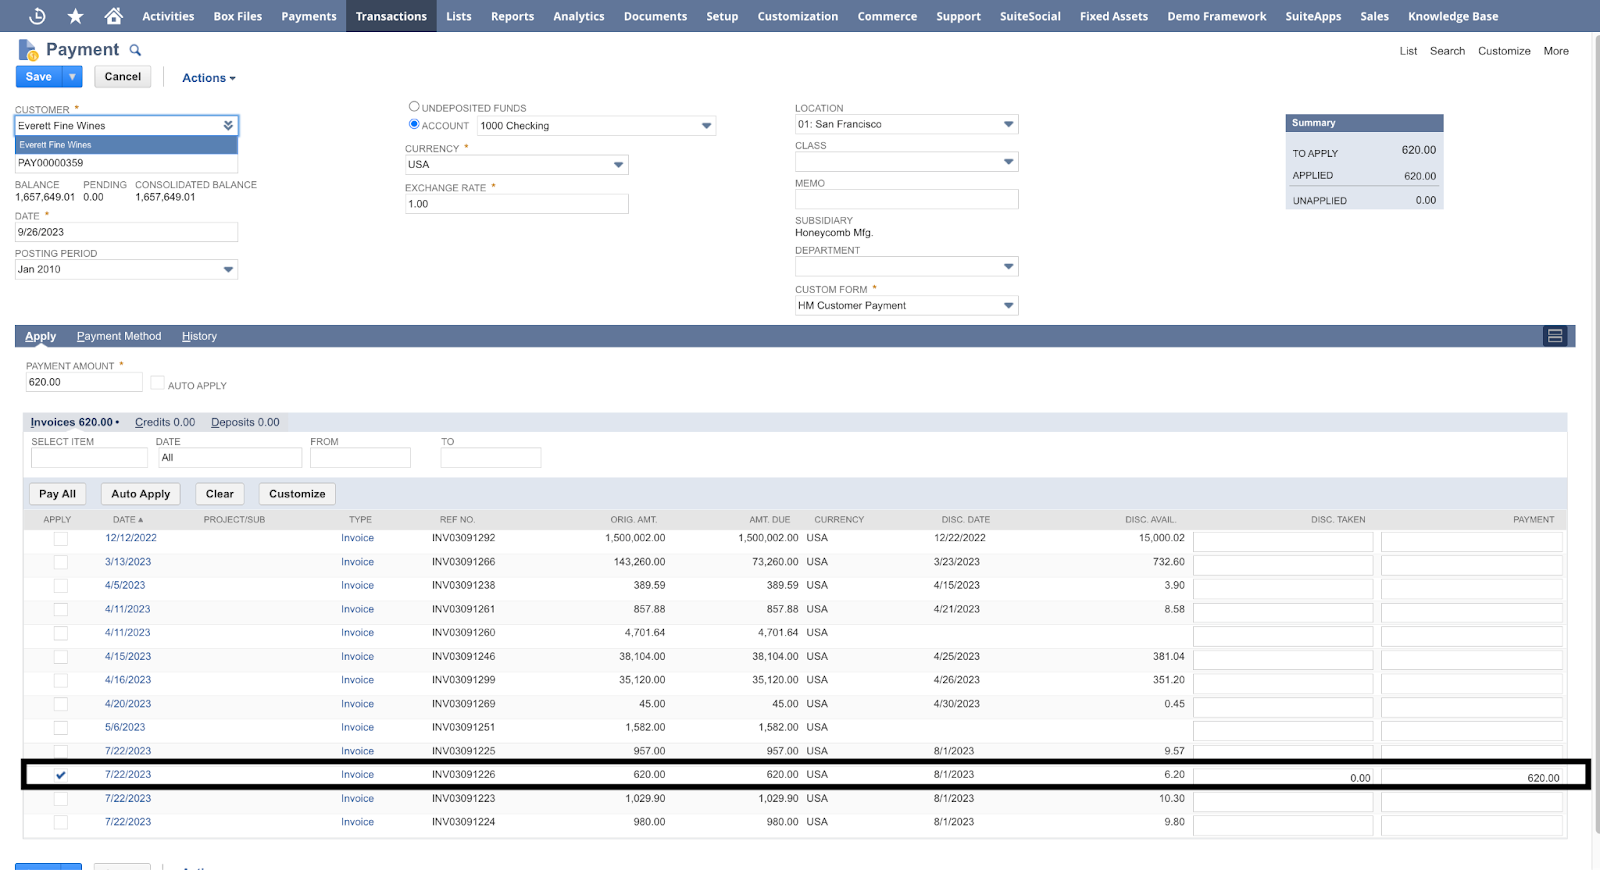
Record Payment for Invoice
Enables record payments for open Invoices in the table.
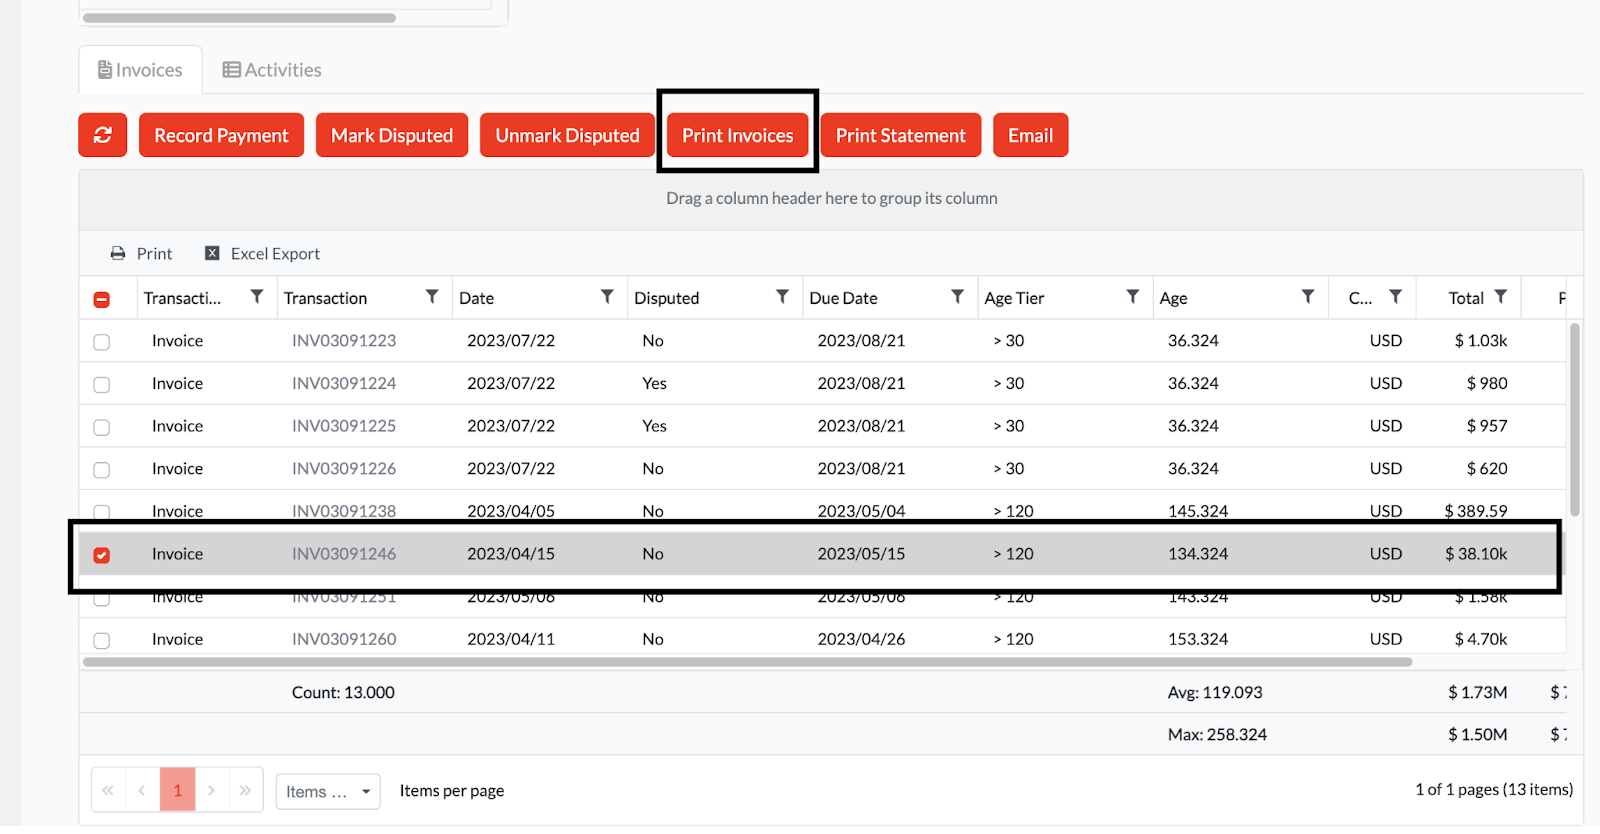
Print Invoices
Print open invoices in a PDF format.
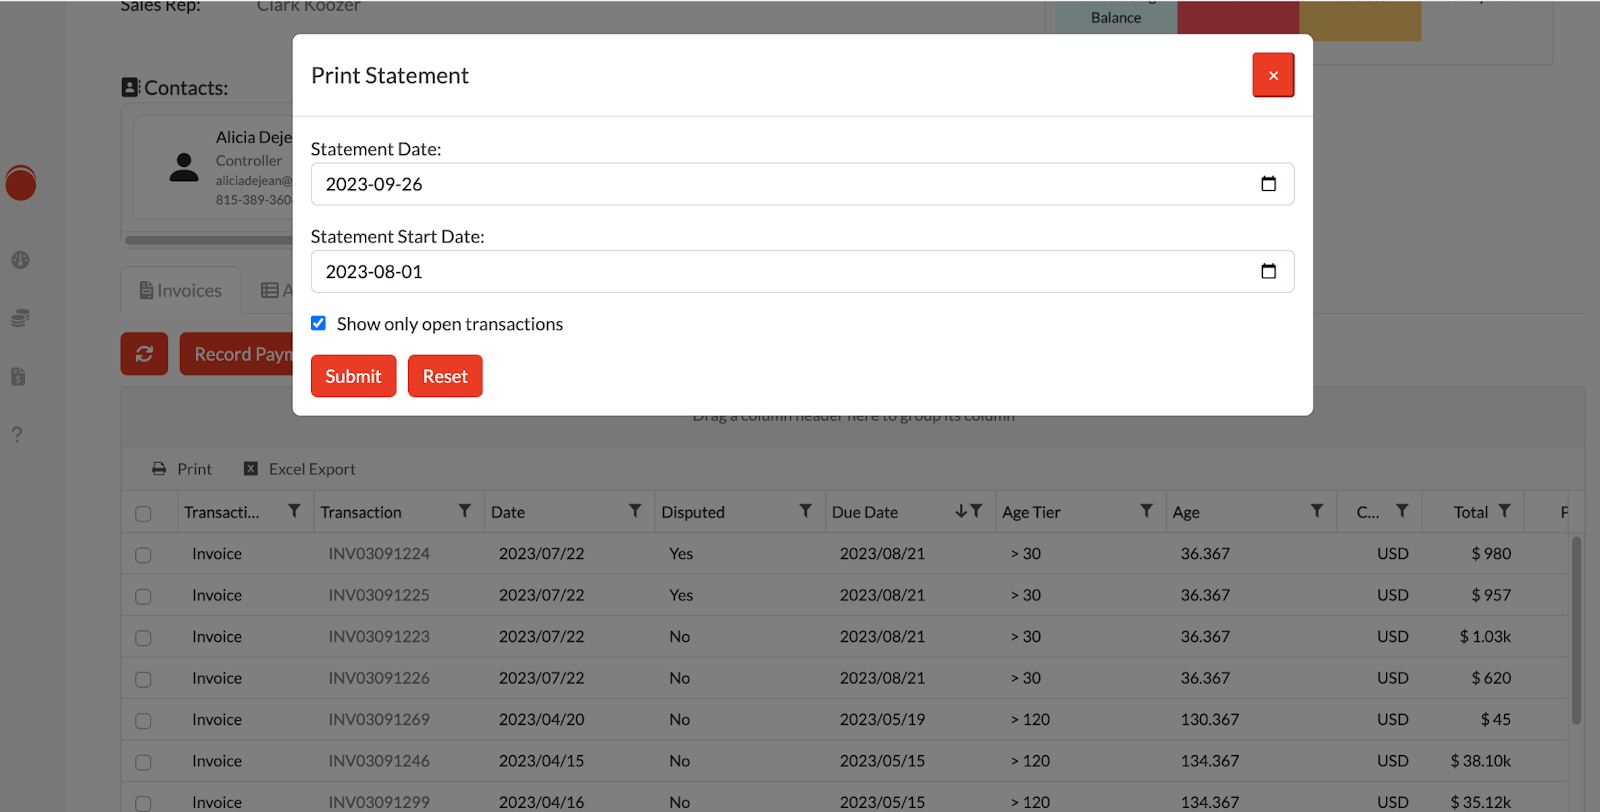
Print Statement
Print statements within a specified date range.
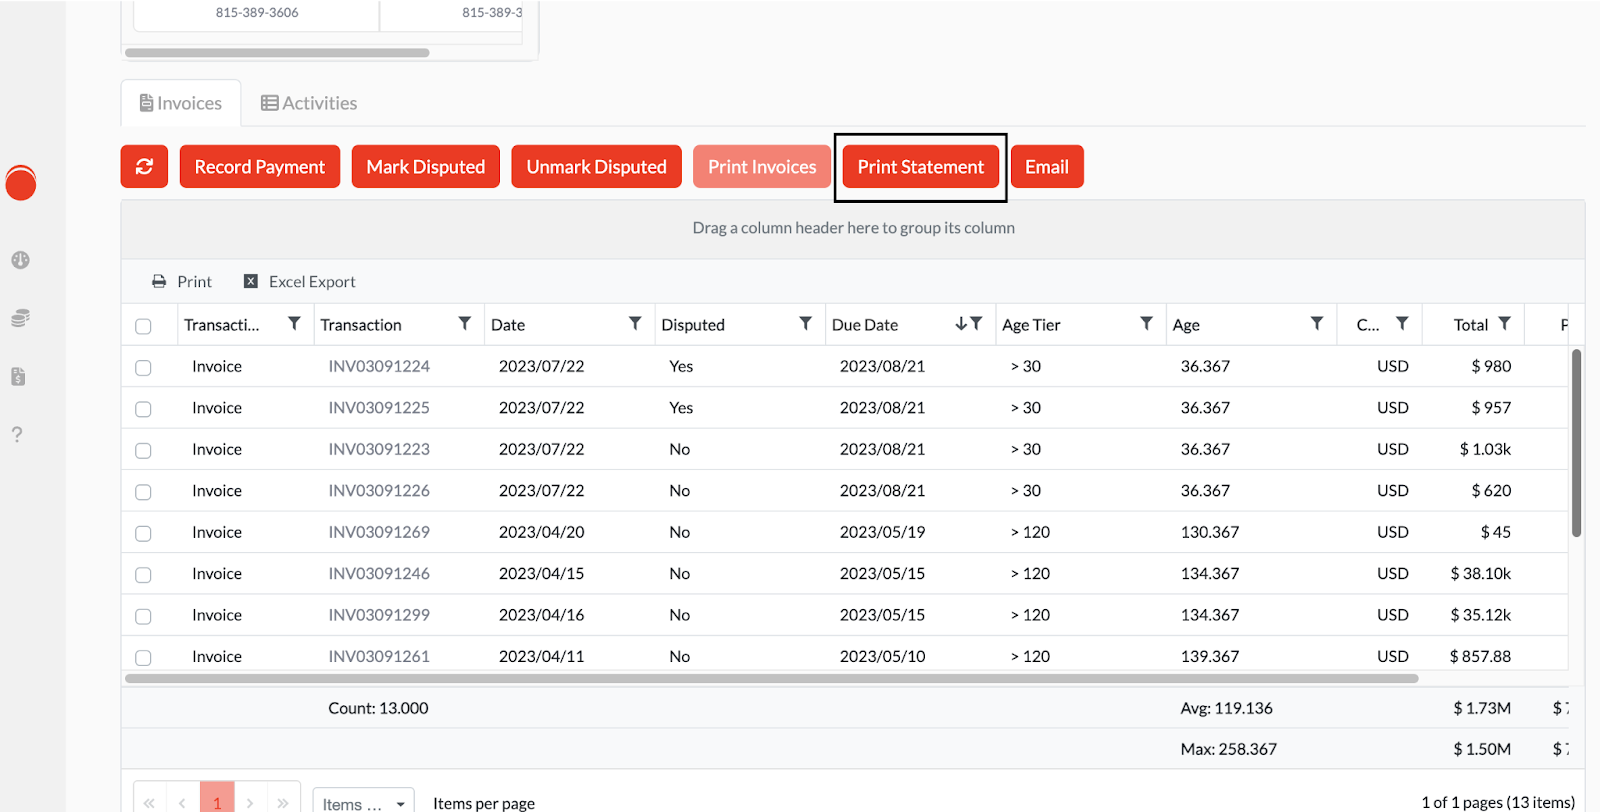
A dialog will appear to enter the date range. The option to select only open transactions is available.
Email the selected invoices as attachments.


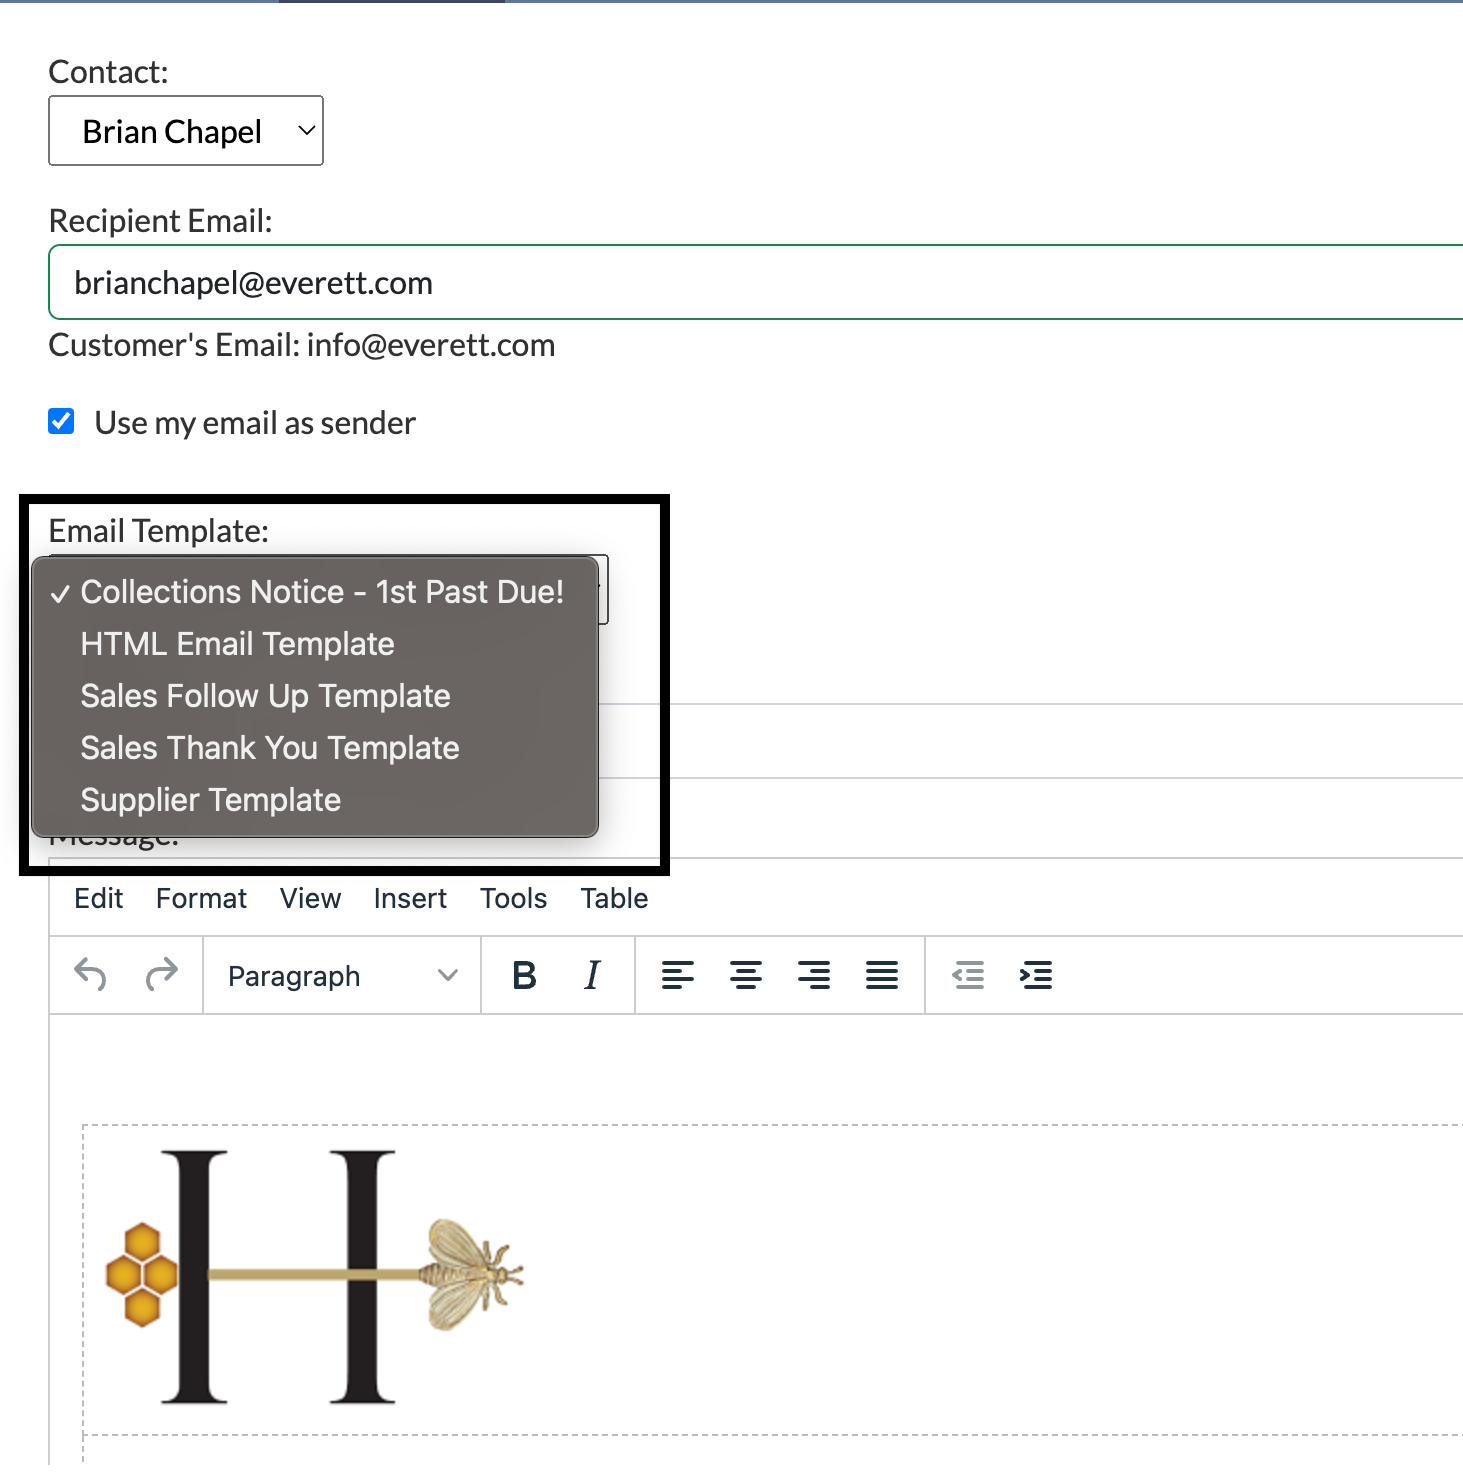
Once submitted, the email is sent with the attachments.
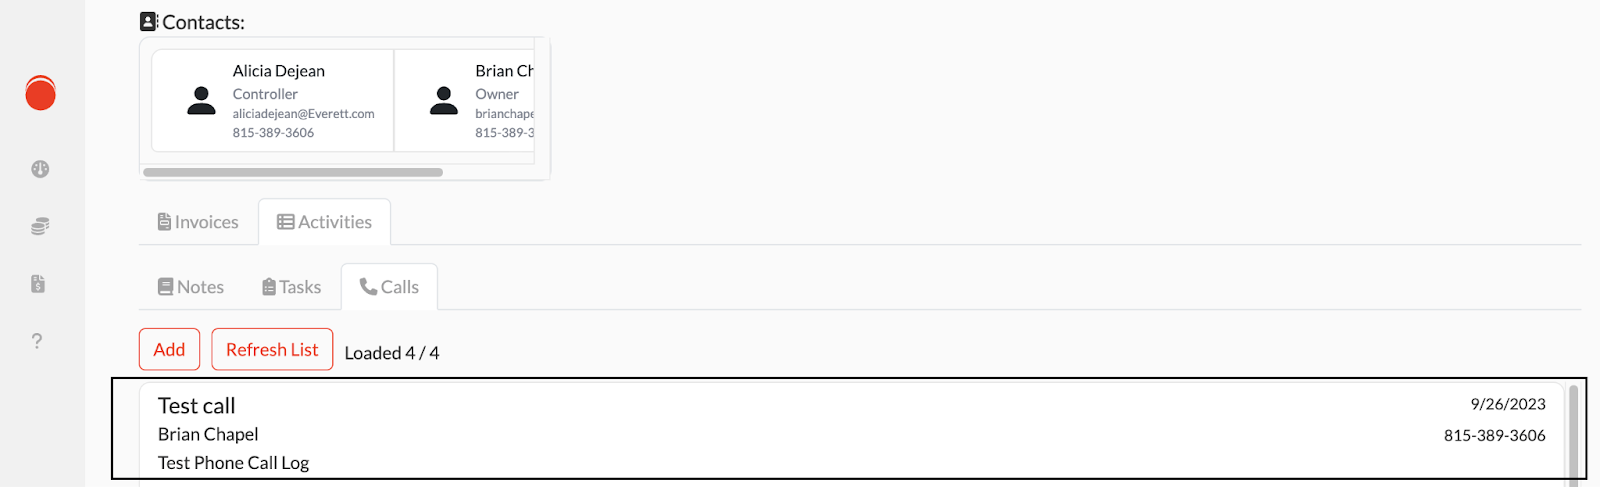
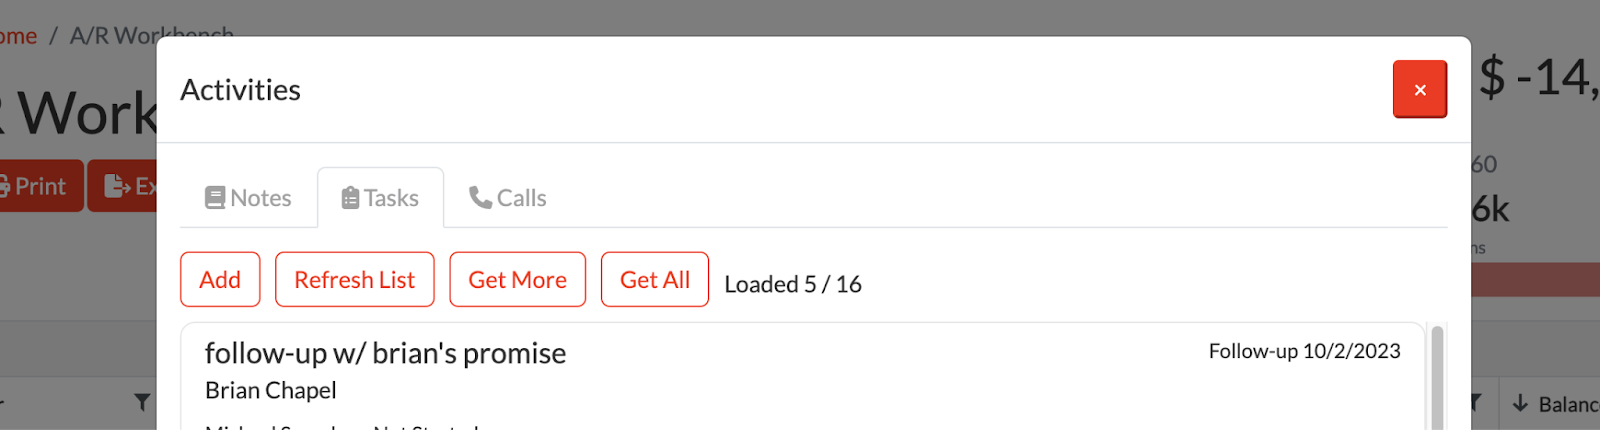
Working with the Activities subtab
The activities subtab has categories for Notes, Tasks, and Calls. These can be created for the customer in order to create reminders for upcoming dates, or leave notes as needed.
Each category will have these buttons:
The “Add” button will open a dialog to create a new activity.
The “Refresh” button will refresh the list of entries for the selected activity and check for updates.
The “Get More” button displays the next few entries of the selected activities.
The “Get All” button will display all entries of the selected activity.
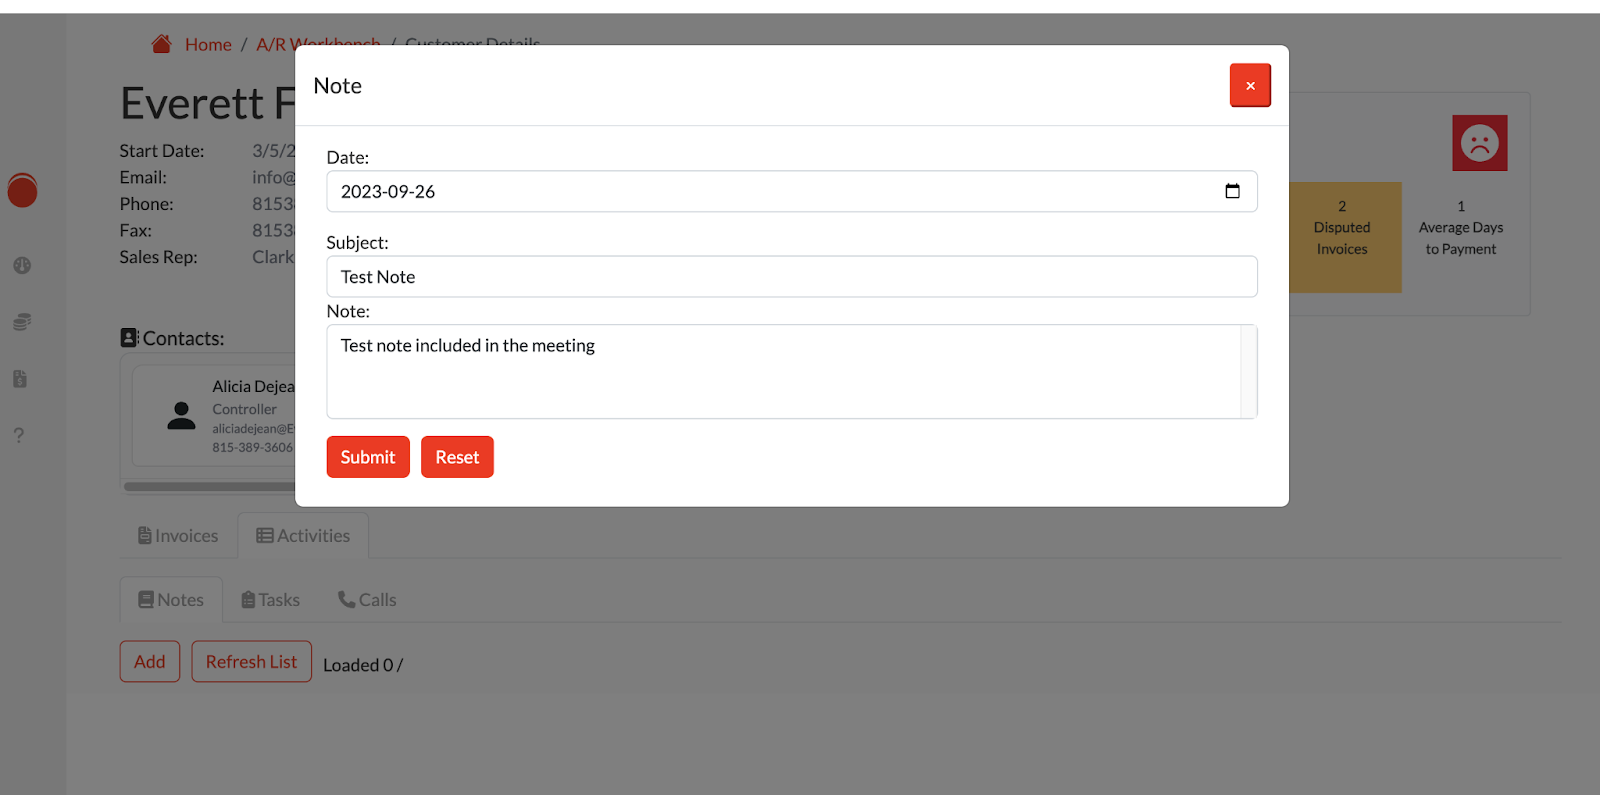
Notes
Notes are available for customers under the Notes subtab. Clicking the “Add” button will open a dialog to create a new Note. The Note’s date, subject, and note can be entered before saving the Note to the customer.
Tasks
Tasks are available for customers under the Task subtab. Tasks can be created to allow for tracking and reminders for customers. Clicking the “Add” button will open a dialog to create a new Task. The Task’s type, date, subject, contact, message, and status can be modified in the window.
The Task’s type can be set to either be a “Dunning” task, or a “Follow-up” task.
The Task’s status can be changed depending on the current stage, the options are; “Not Started”, “In Progress”, or “Completed”.

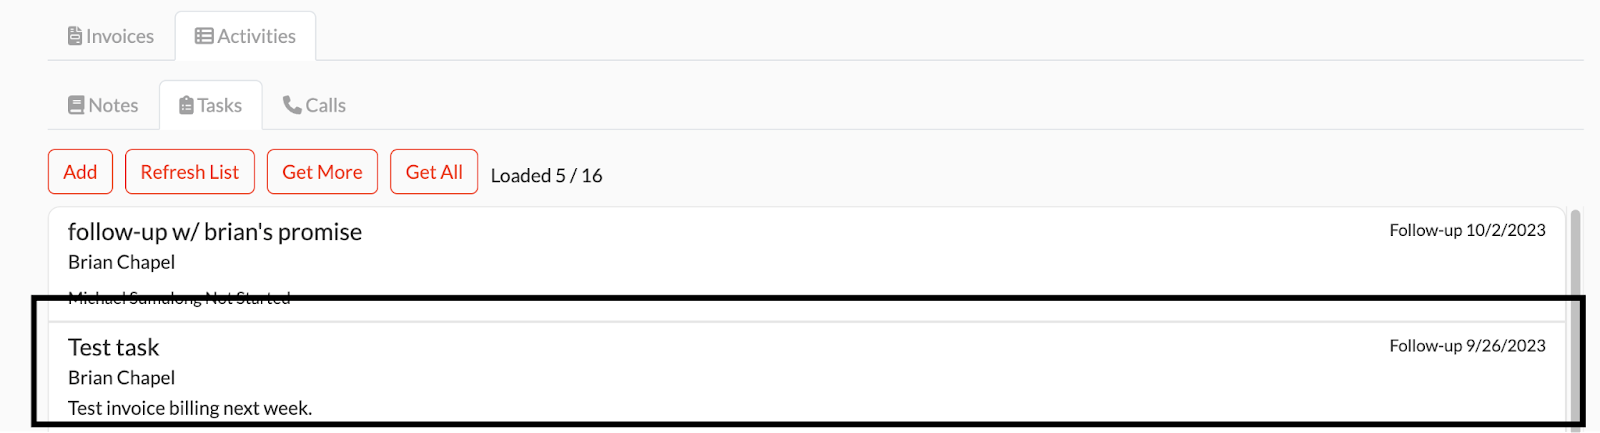
When a Task is created, the client’s Follow-Up date on the A/R Dashboard will be updated.
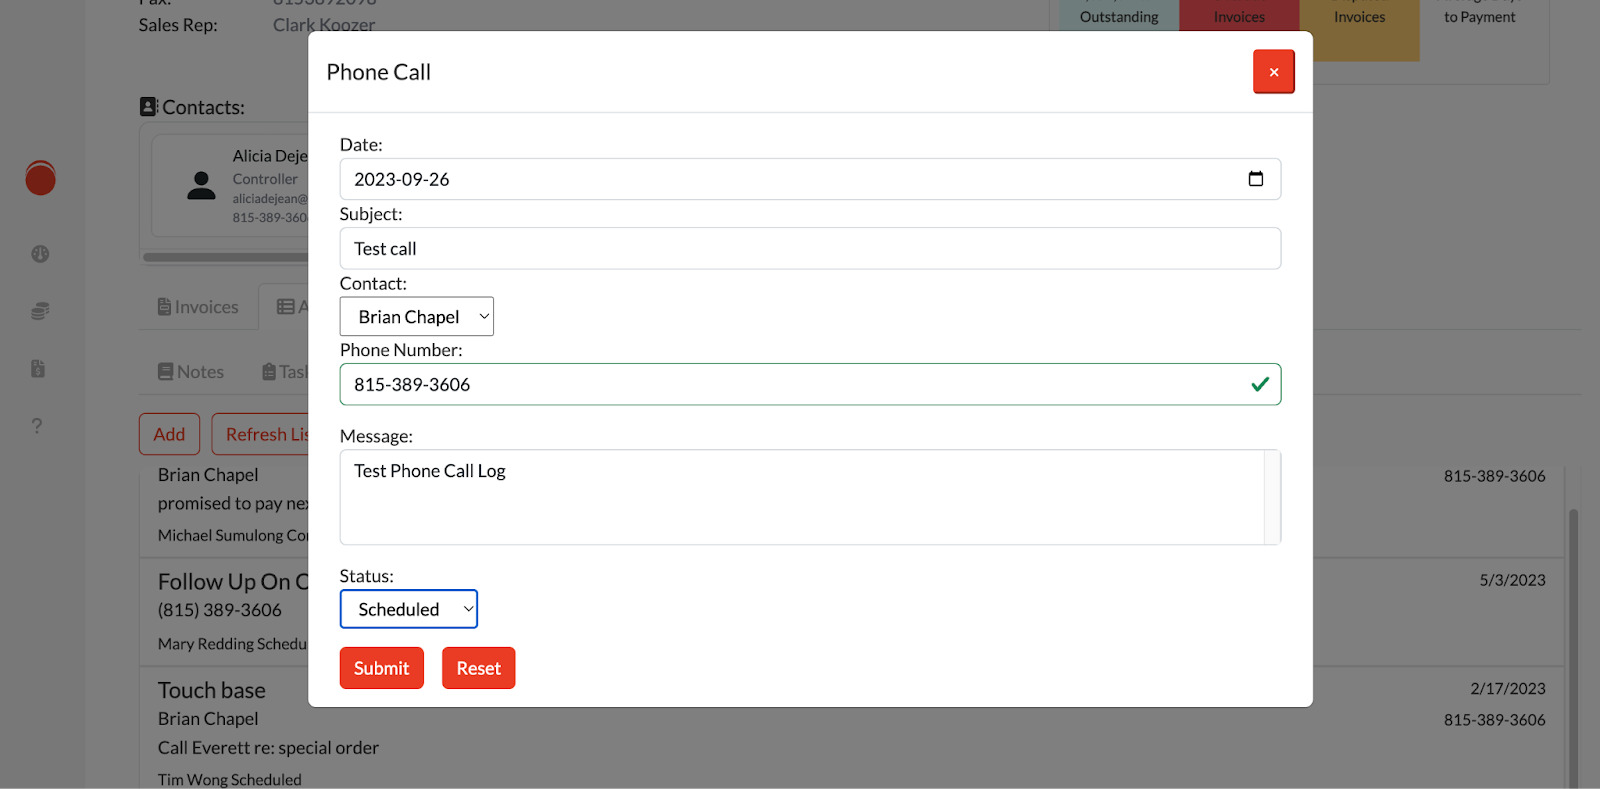
Calls
Phone Calls are available for customers under the Calls subtab. Phone Calls can be created for reminders of upcoming calls, and can be used post-call to leave notes from the call. Clicking the “Add” button will open a dialog to create a new Phone Call. The Phone Call’s date, subject, contact, phone number, message, and status can be modified in the window.
The Phone Call’s status can be changed, the options are; “Scheduled” or “Completed”