A/R Post BasicsUpdated 2 years ago
Welcome to increased A/R efficiency, automation, and payment with A/R Post! This User Guide will help get you started and act as a reference for the overall use of the platform.
The following Quick Start Guide is designed to provide instruction and support for A/R Post and the core solution that it is made up of.
Application UI Elements Walkthrough
Main Dashboard
A/R Post’s Main Dashboard is designed to allow Accounts Receivables resources to be able to quick and easily gain useful information and detail about their receivables. However, the main dashboard can also be used as a reference for users of any discipline. If desired, the main dashboard can provide insight and information at a glance to users at an executive level or as a presentation piece.
The Main dashboard has several components:

On the left-hand side, users are presented with a side menu to navigate between NetSuite Subsidiaries as well as supported currencies. These two settings are respected globally throughout the rest of the system.
Below the global settings is the main navigation Menu. A/R Post keeps a simplified navigation, users can simply select between the A/R Post dashboard and the A/R Post Workbench.
A/R Post Dashboard: This is the main content of the A/R Post home page, it contains your company's AR Funnel which is a quick overview of AR statistics. Below the funnel you will find useful KPI’s such as DSO and INSERT MORE and at the bottom on the main dashboard, you will find the A/R Post “Top 10’s” allowing you to quickly evaluate which items require immediate attention.
AR Workbench
The AR Workbench consolidates multiple functional areas while adding in automation to the receivables process, allowing users to do more with less.
The AR Workbench comprises 2 main areas:
The header, consisting of the ability to export and print the workbench report, is in this top left area that you will also find the “reset” button that will allow users to reset any filters or sort criteria they have set.
The second area is the customer list, this area provides a way to track and manage your AR aging while also having the ability to interact with the customer directly in this dialogue.
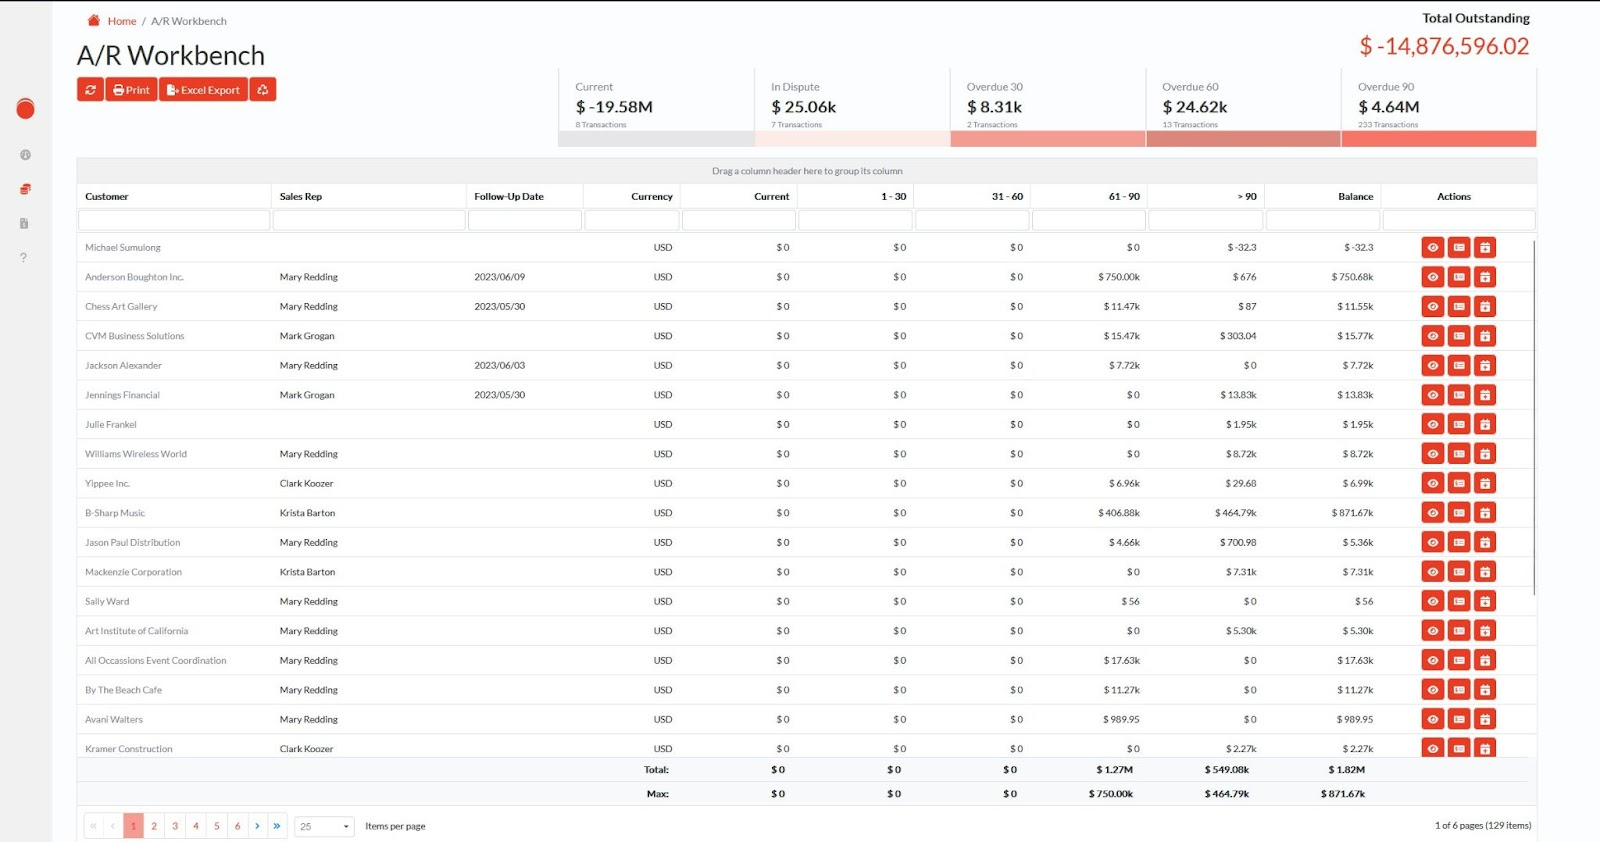
The customer list portion of the workbench includes standard NetSuite receivables information as well some additional automation:
View Details: open this customer's specific receivable details in a single view
Record Payment: accept payment against open invoices
Add Followup: Add a reminder to complete and activity or action with a given customer
Once you have selected a customer to work with, you can open the customer details by clicking the customer name, or the “view details” button.
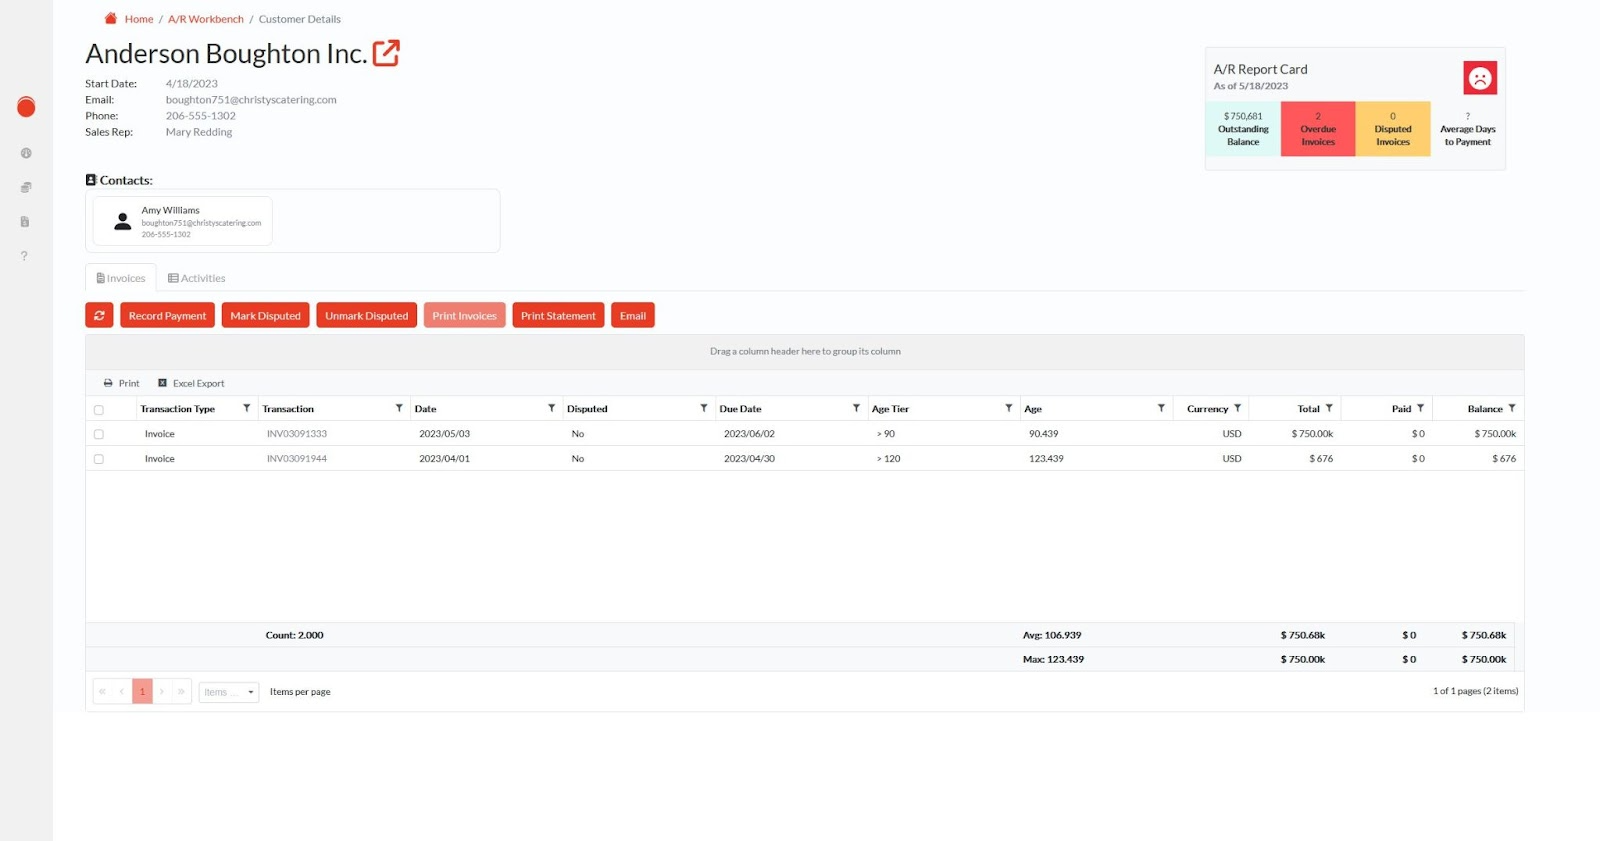
Customer Details
The Customer Details section of A/R Post allows you to view multiple customer data points in a single view. This includes:
Contact information
Invoices
Activites
A/R Report card
This section also allows you to take several actions from this screen:
Record Payment
Mark Disputed
Unmark Disputed
Print Invoices
Print Statement
Email
This portion of A/R Post is your one-stop for full customer receivables management.